> ## Documentation Index
> Fetch the complete documentation index at: https://docs.textql.com/llms.txt
> Use this file to discover all available pages before exploring further.
# Okta
> Step-by-step guide to configure Okta OIDC for TextQL
Configure Okta as your identity provider for TextQL SSO.
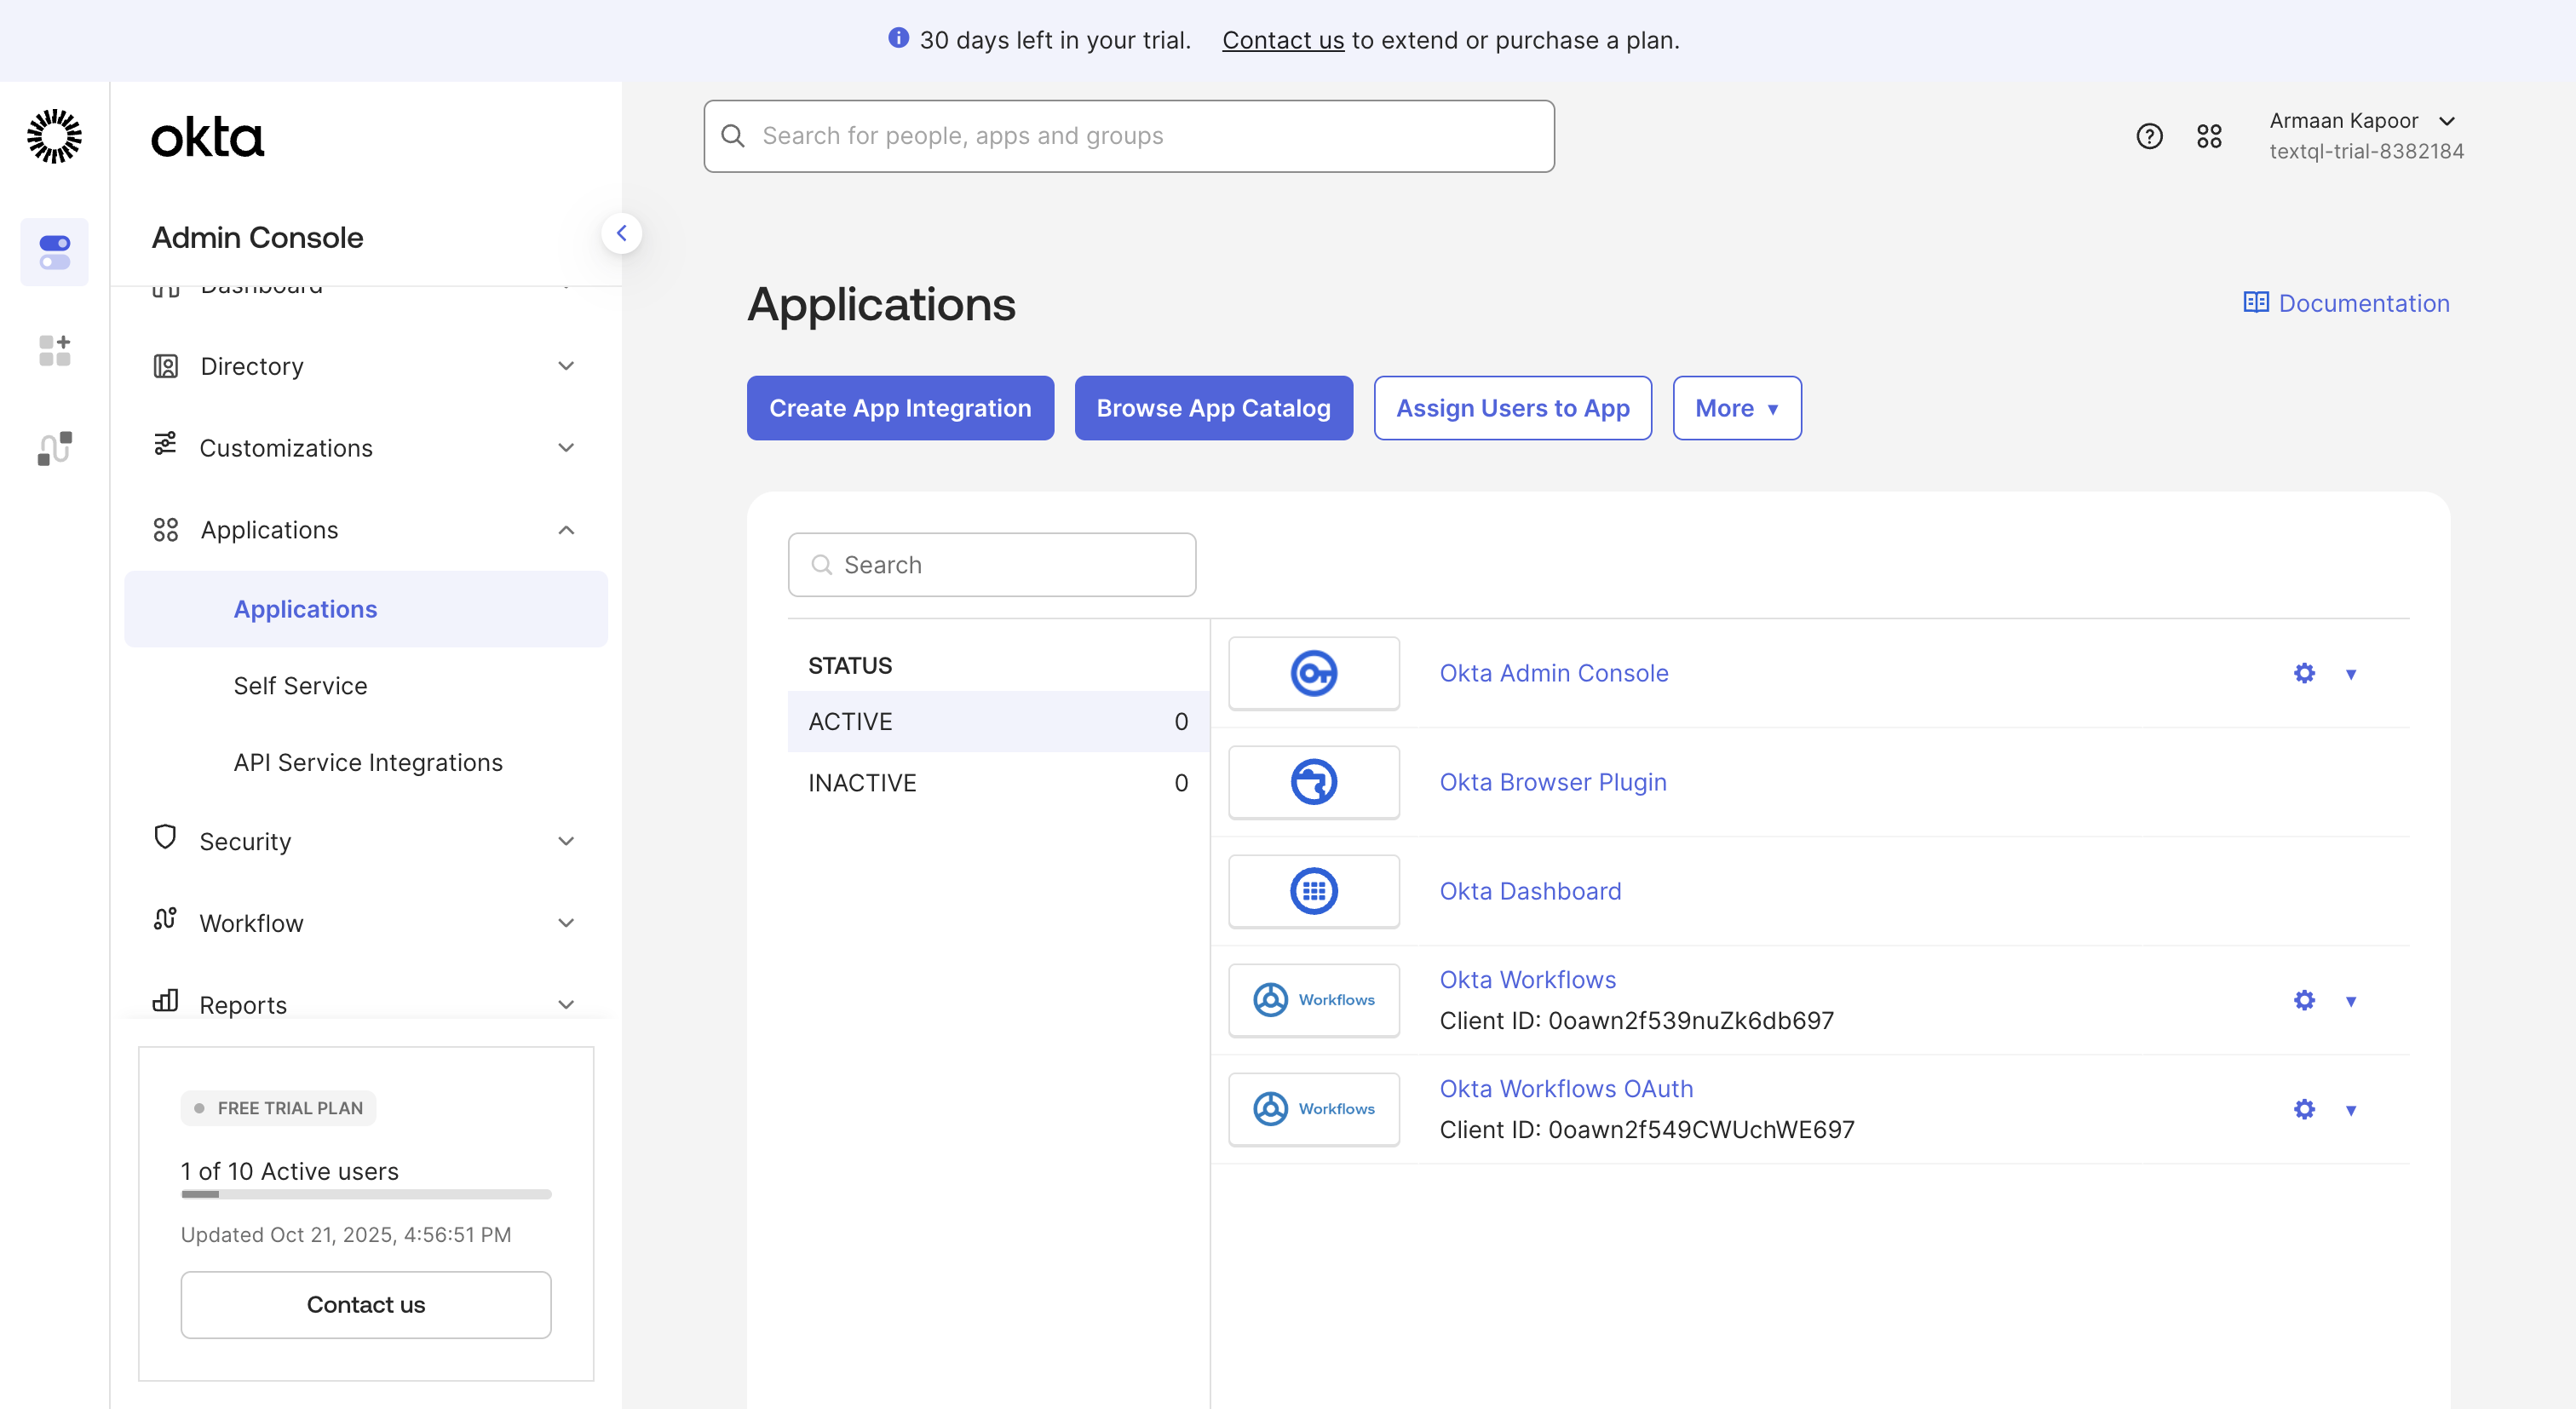
## Step 1: Navigate to Applications
In your Okta Admin Console, go to **Applications** → **Applications**.
 ## Step 2: Create App Integration
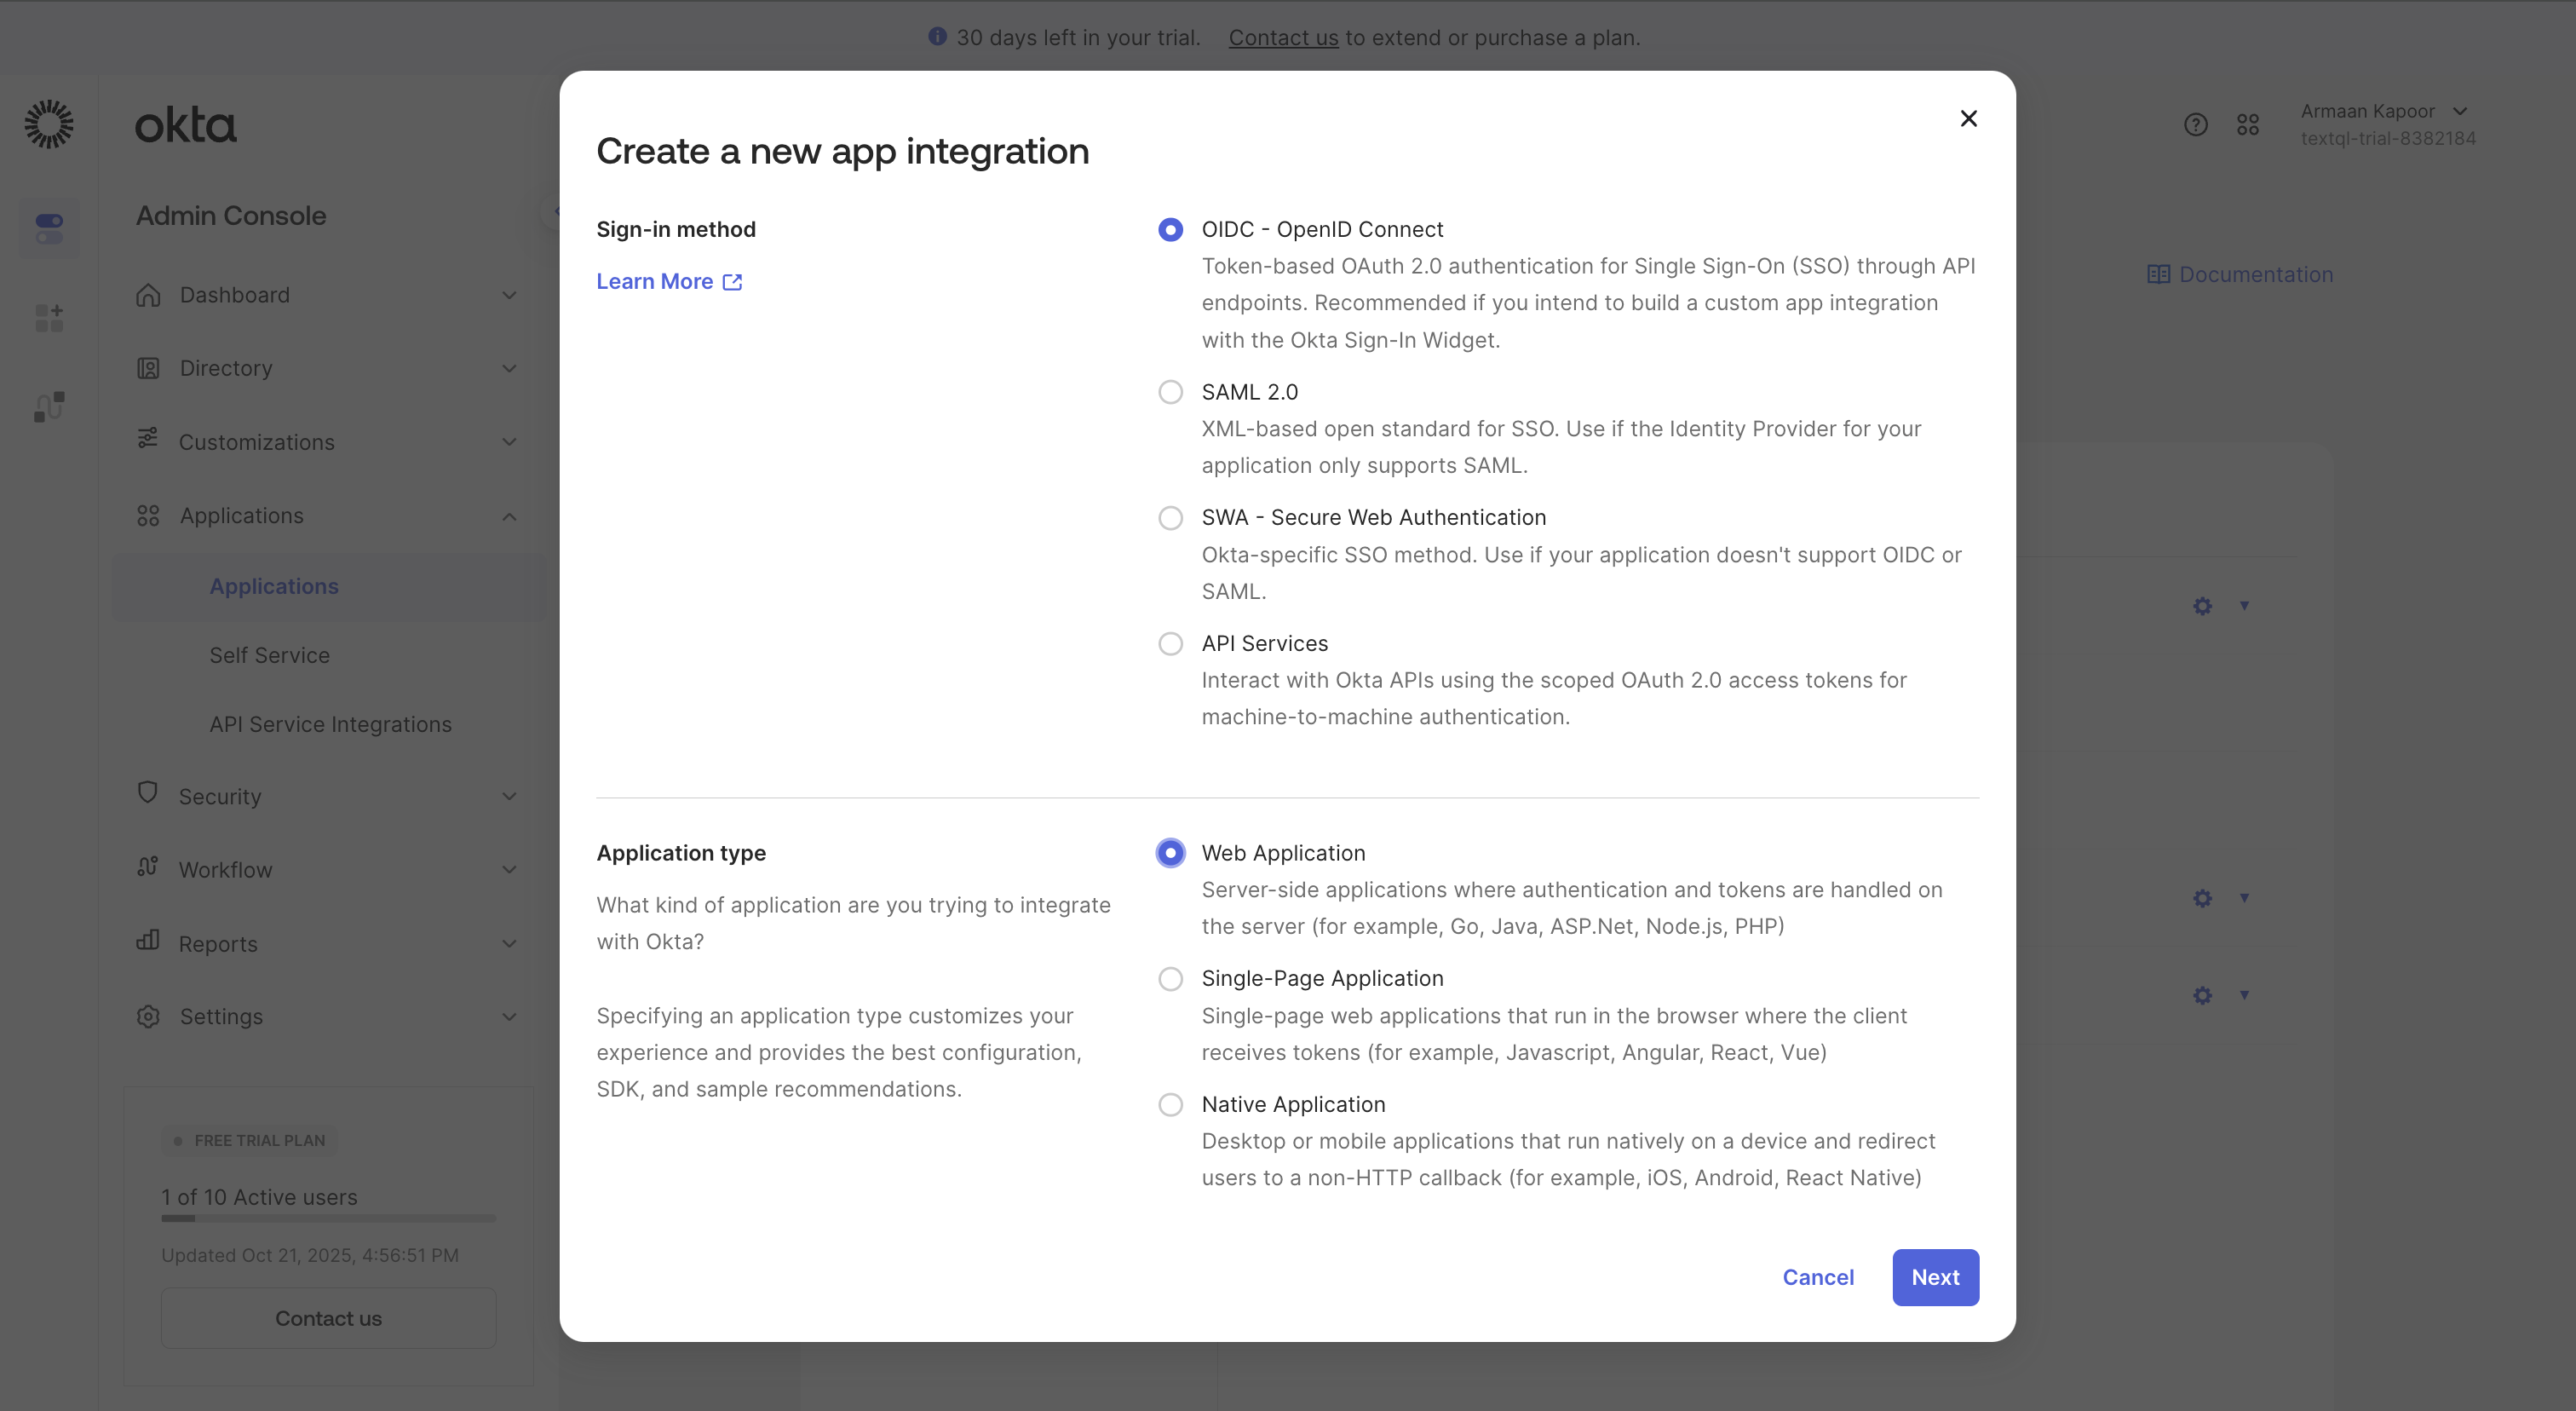
Click **Create App Integration**. Select **OIDC - OpenID Connect** and **Web Application**, then click **Next**.
## Step 2: Create App Integration
Click **Create App Integration**. Select **OIDC - OpenID Connect** and **Web Application**, then click **Next**.
 ## Step 3: Copy Redirect URL from TextQL
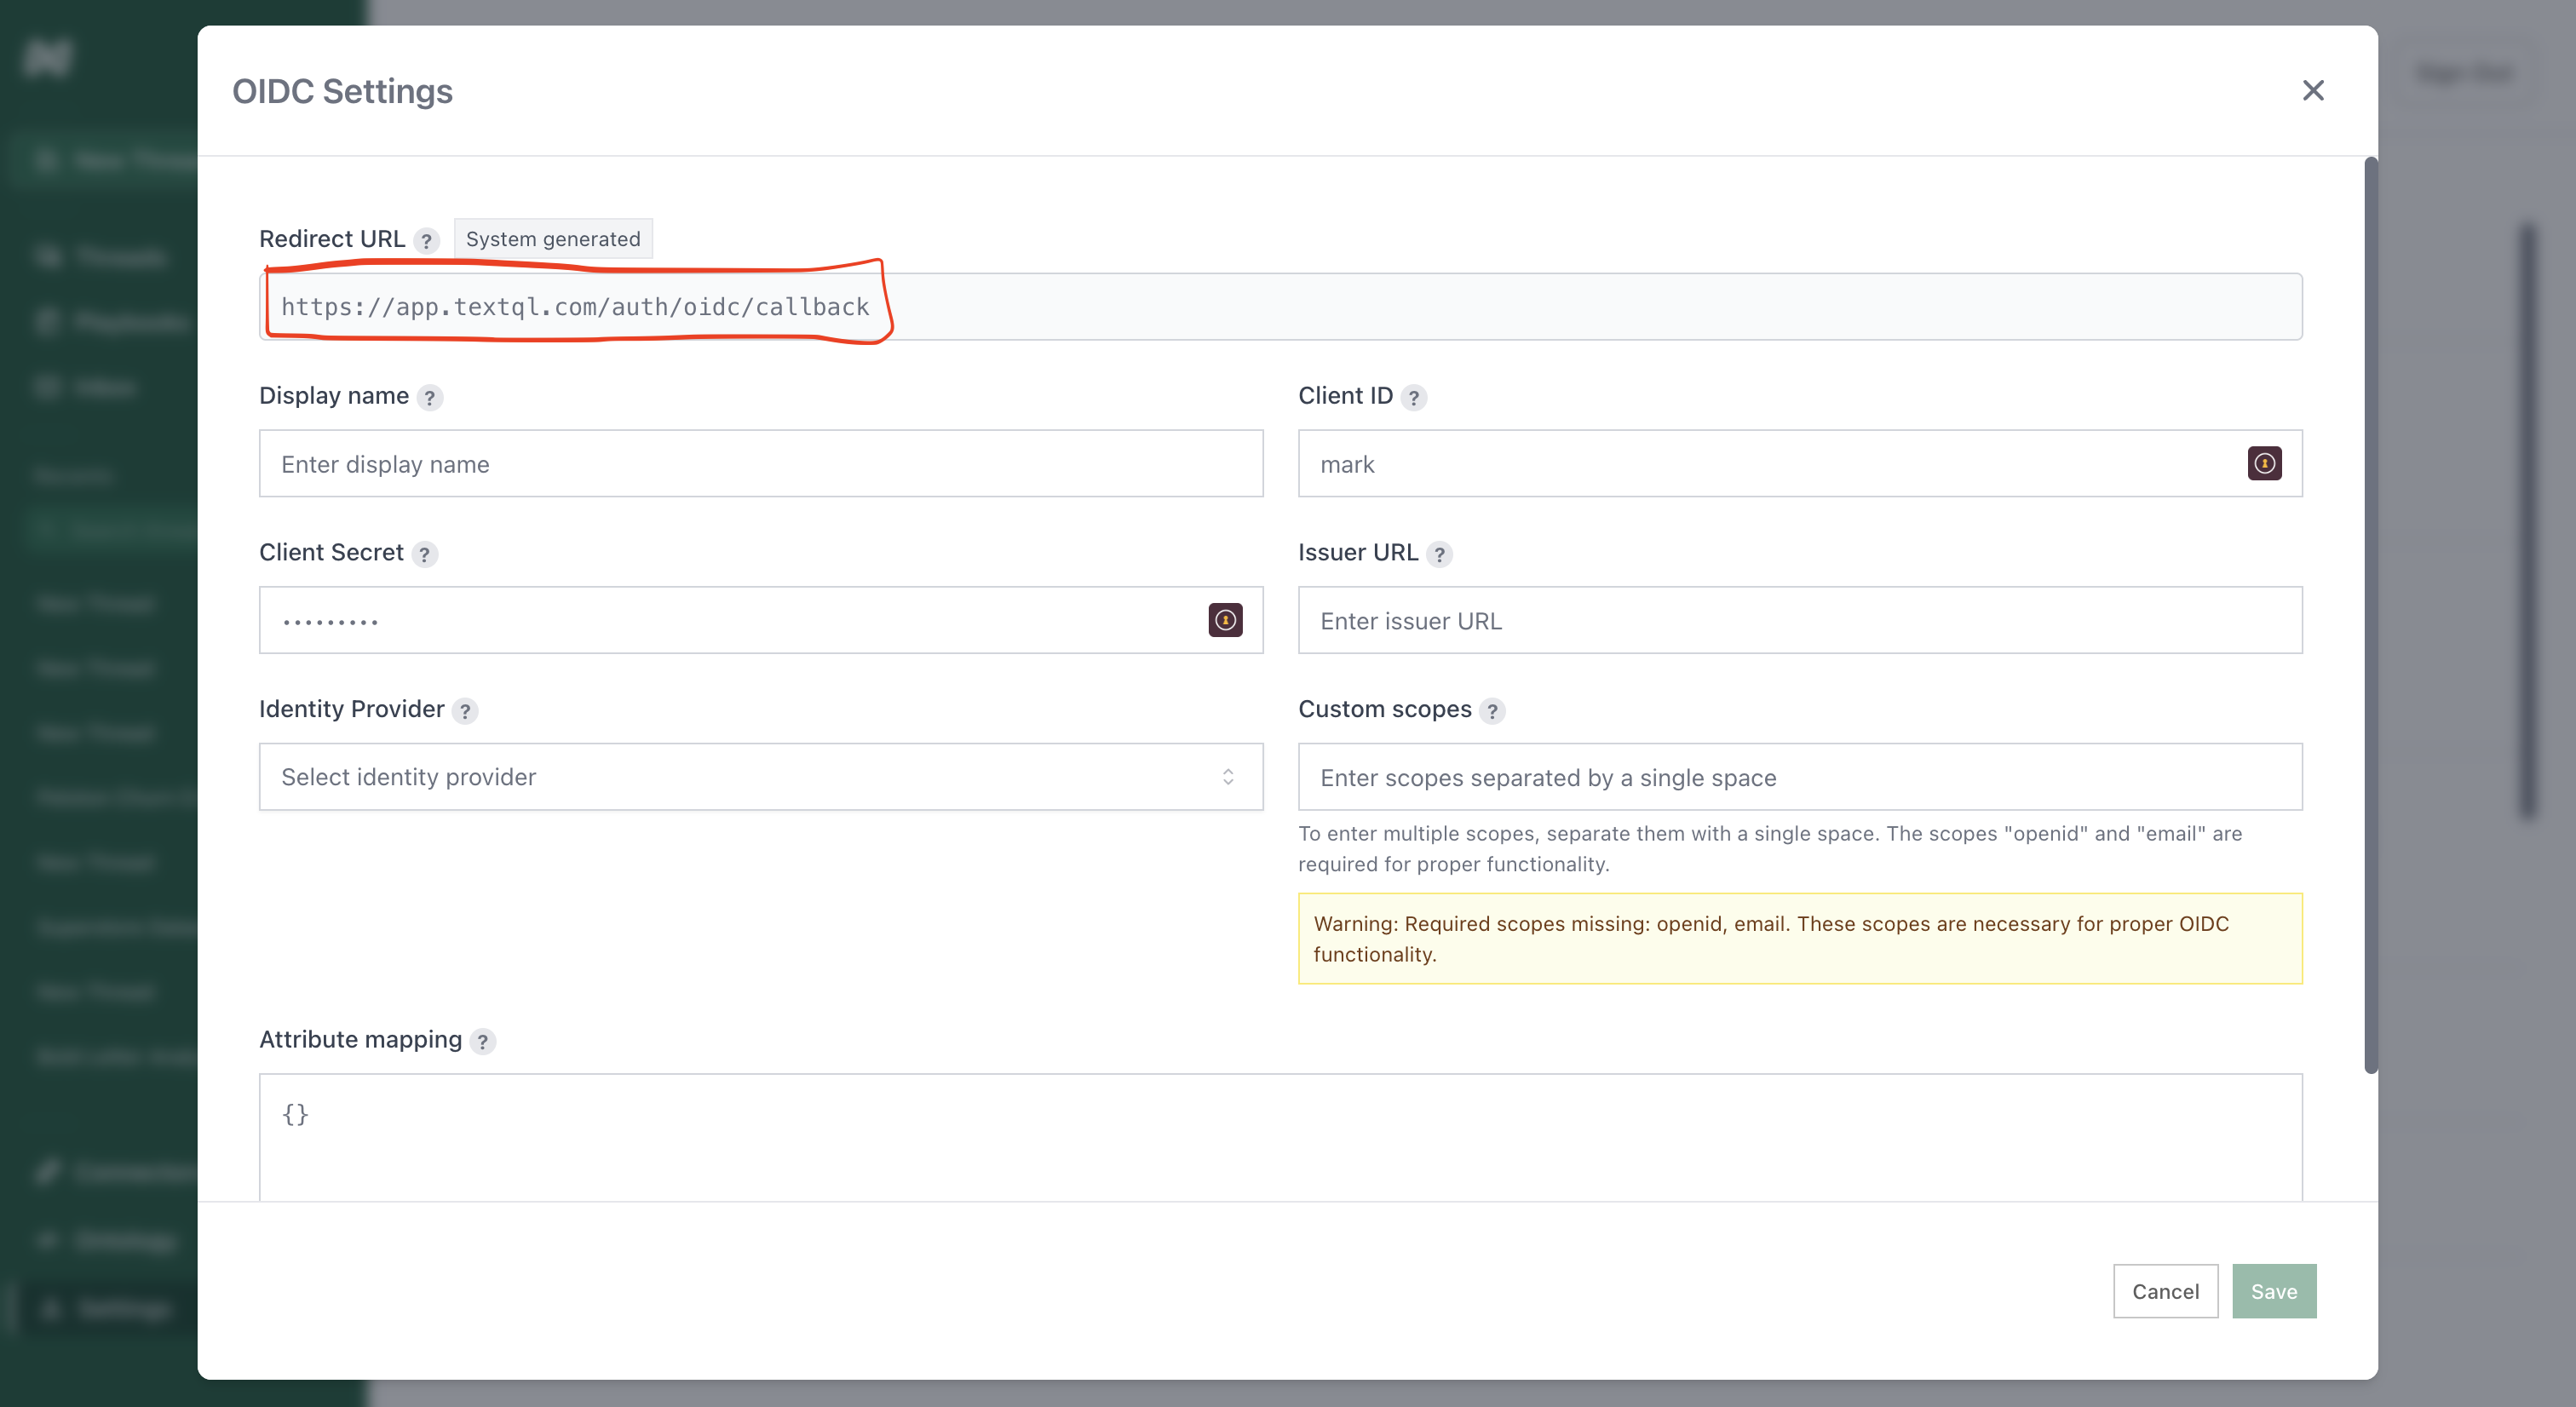
Open TextQL OIDC Settings and copy the Redirect URL.
## Step 3: Copy Redirect URL from TextQL
Open TextQL OIDC Settings and copy the Redirect URL.
 ## Step 4: Configure the Okta App
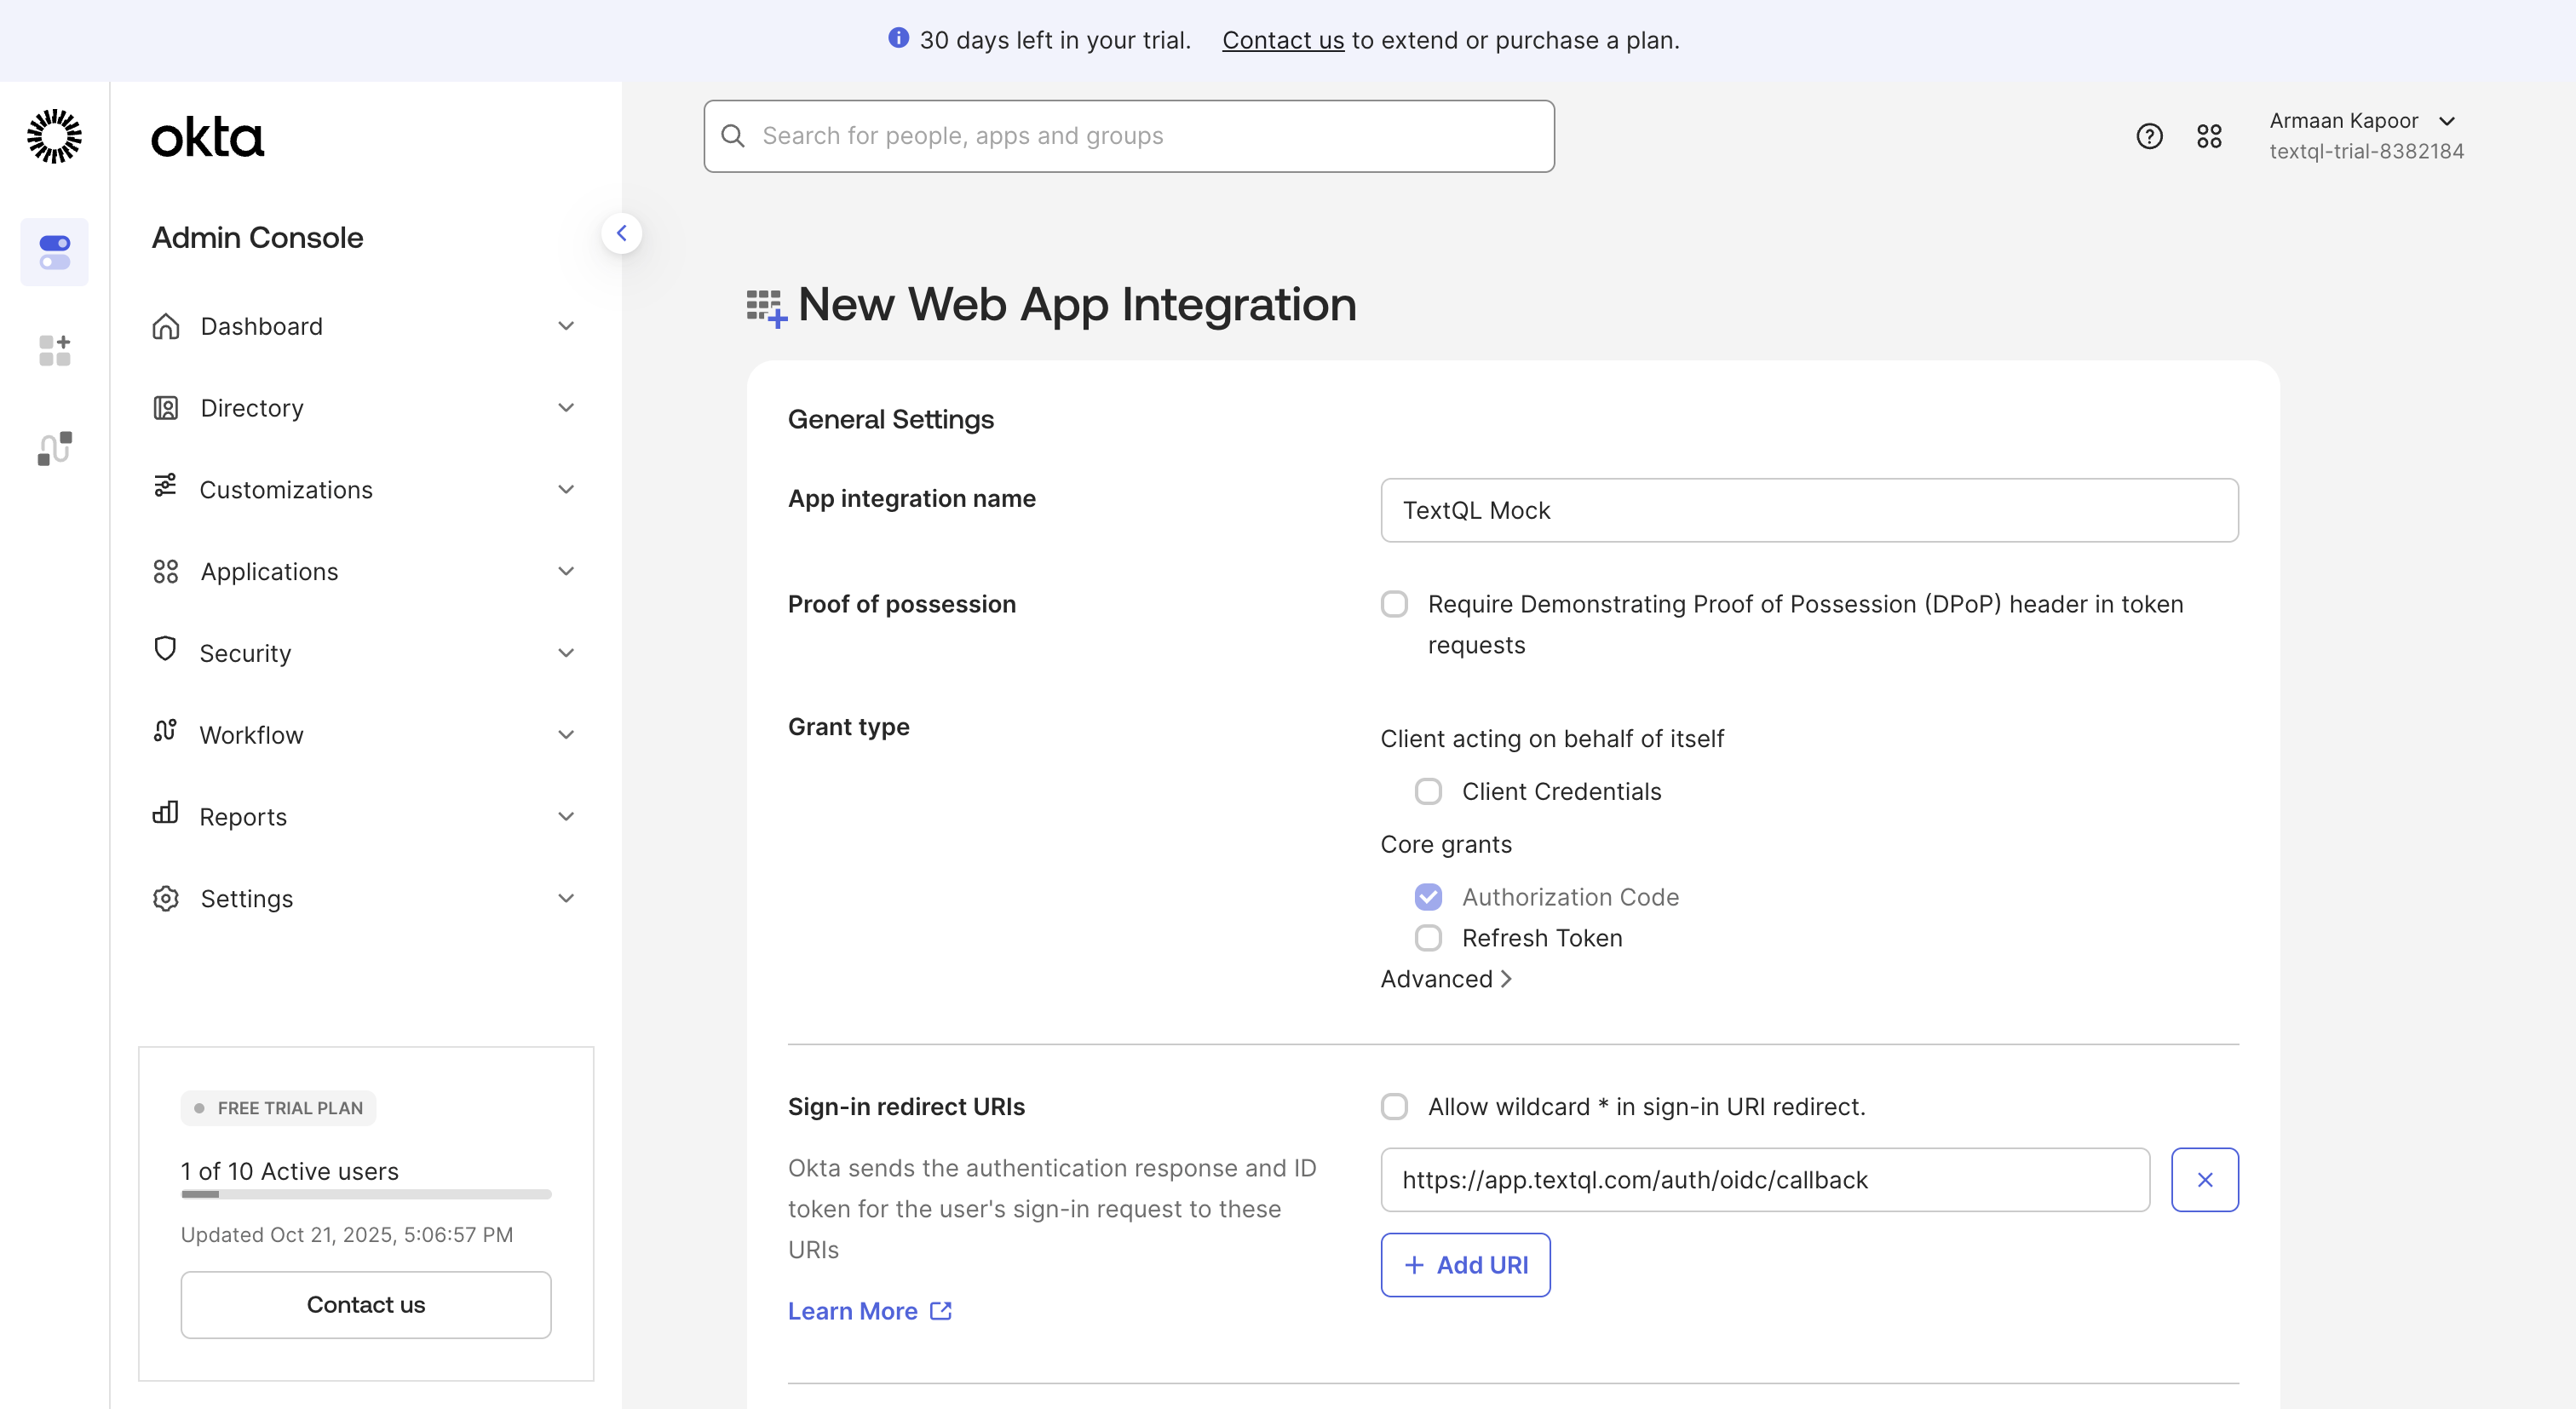
Fill in the form:
* **App integration name**: `TextQL`
* **Sign-in redirect URIs**: Paste the redirect URL from TextQL
## Step 4: Configure the Okta App
Fill in the form:
* **App integration name**: `TextQL`
* **Sign-in redirect URIs**: Paste the redirect URL from TextQL
 Click **Save**.
## Step 5: Copy Client Credentials
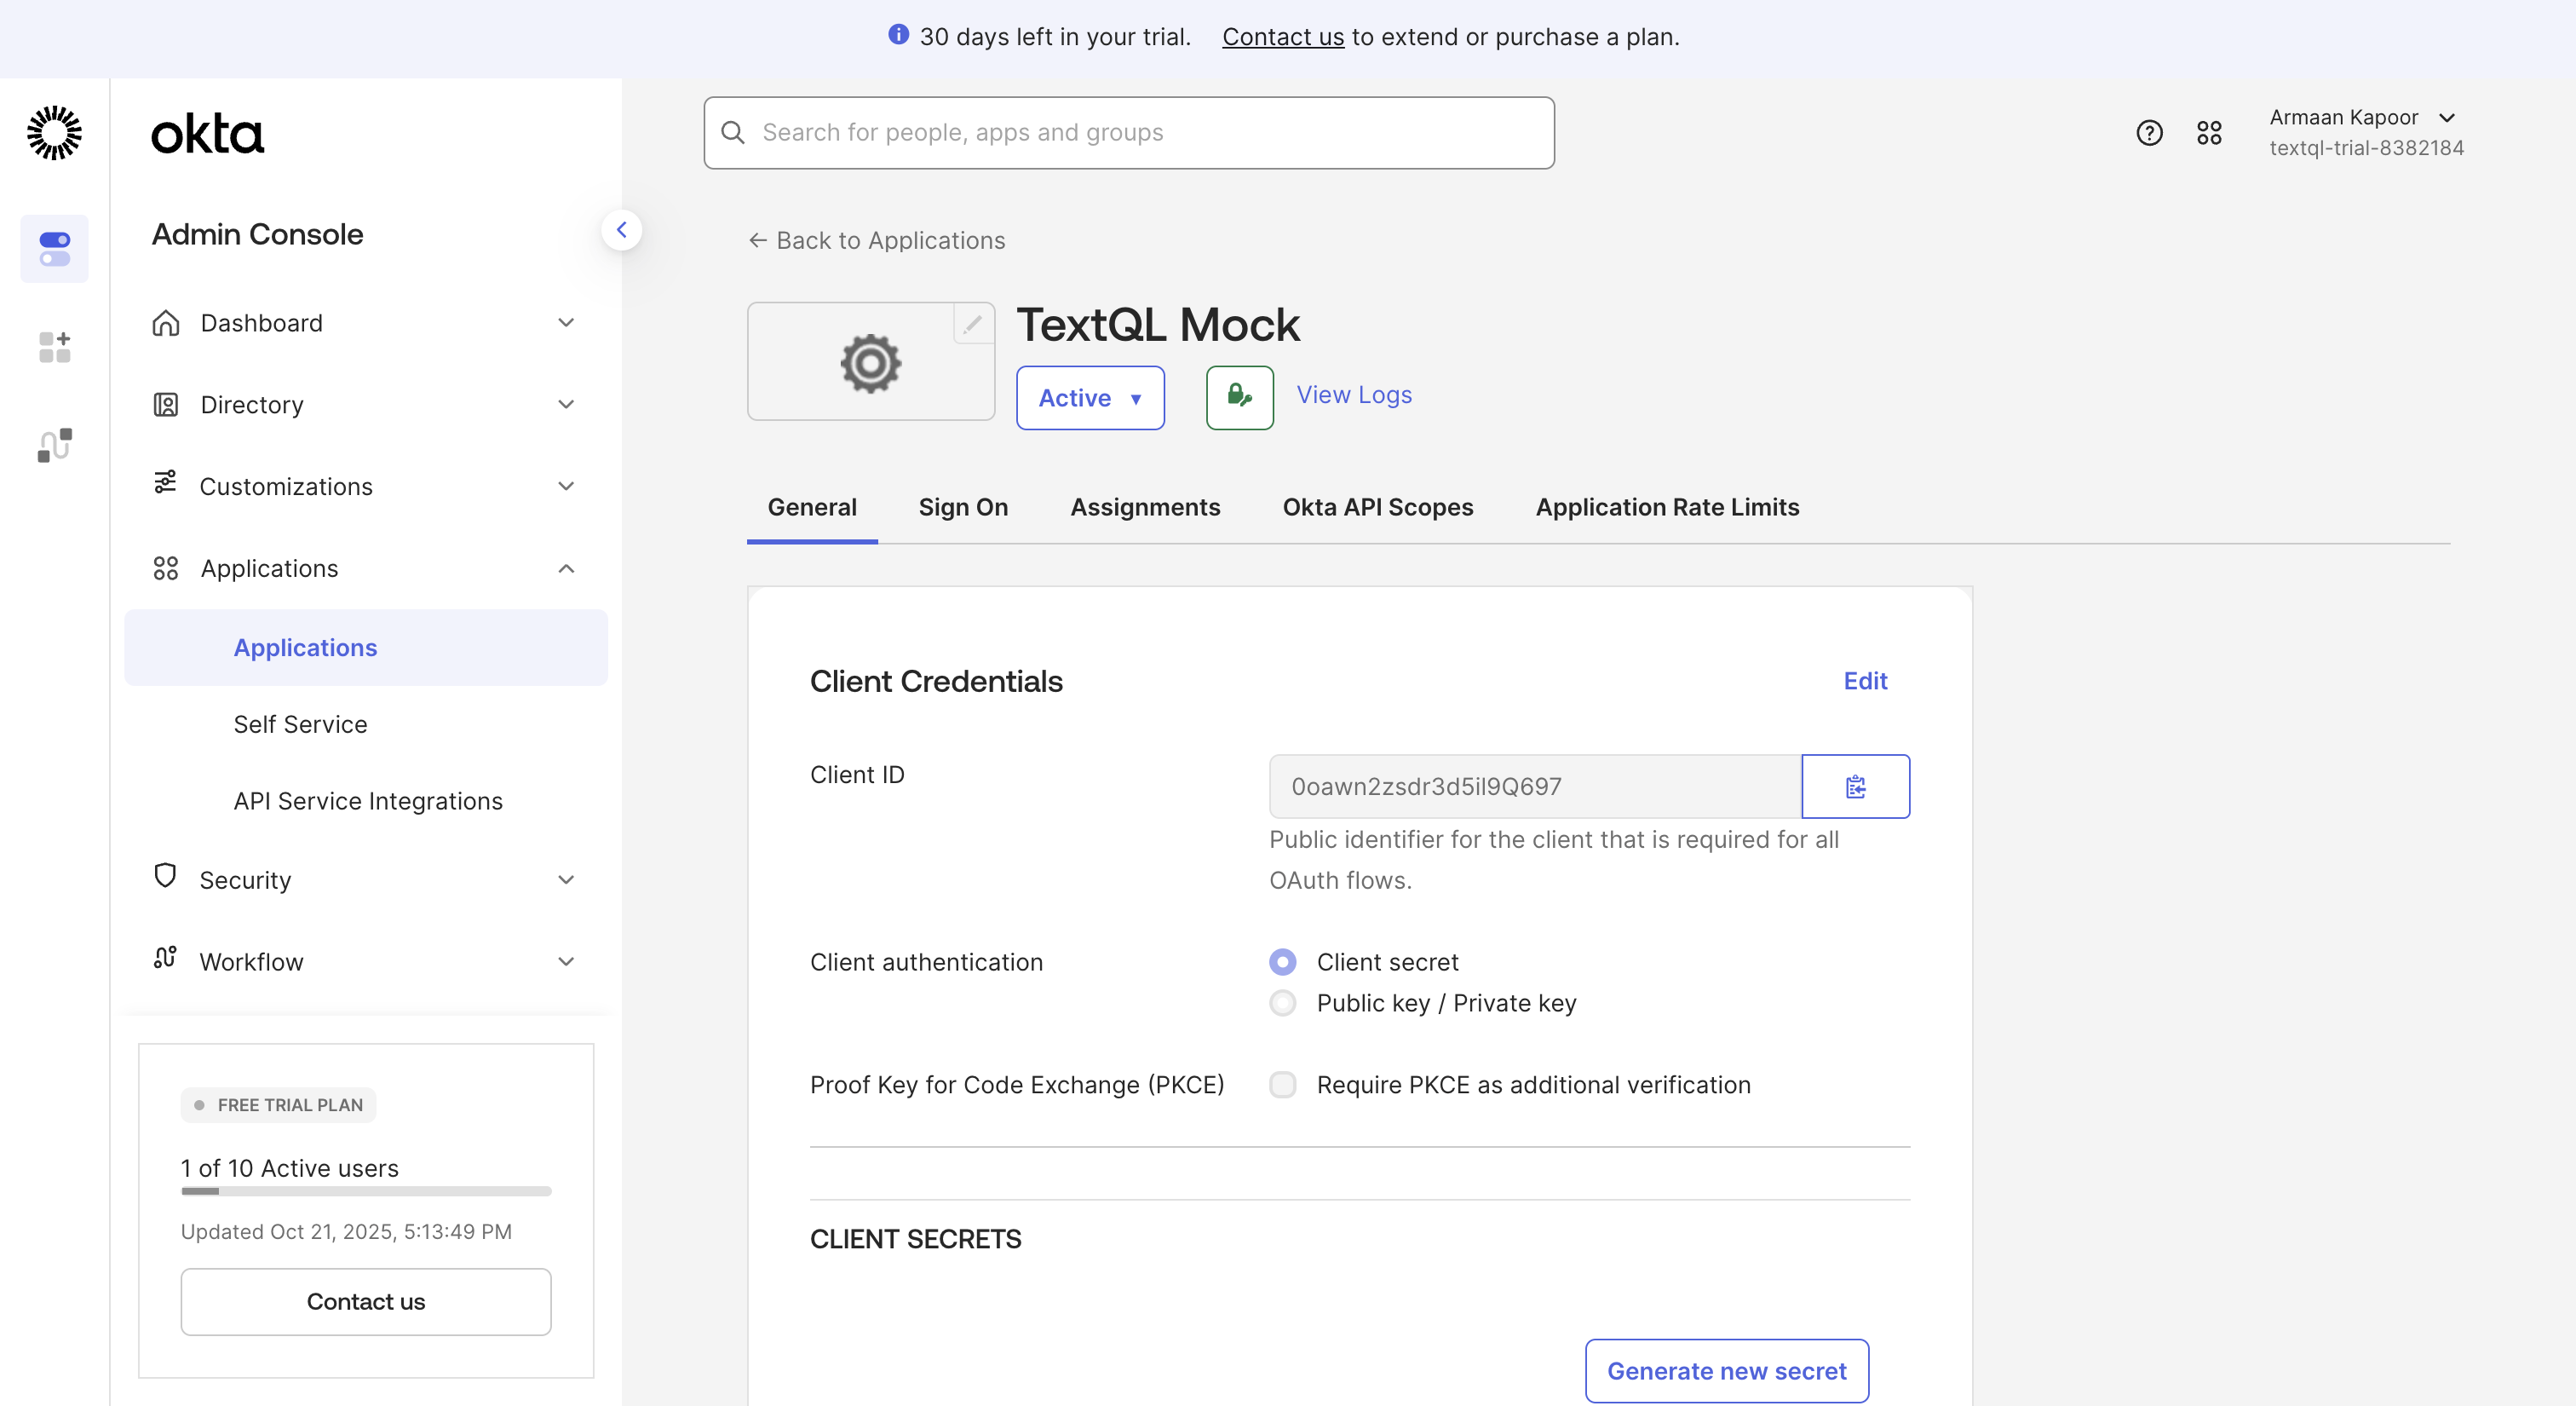
After saving, you'll see the General tab with your client credentials. Copy the following values to enter into TextQL:
* **Client ID**: Click the copy button next to the Client ID
* **Client secret**: Click **Generate new secret** if needed, then copy it
Click **Save**.
## Step 5: Copy Client Credentials
After saving, you'll see the General tab with your client credentials. Copy the following values to enter into TextQL:
* **Client ID**: Click the copy button next to the Client ID
* **Client secret**: Click **Generate new secret** if needed, then copy it
 You'll also need your **Issuer URL**, which is your Okta domain (e.g., `https://yourcompany.okta.com` or `https://dev-xxxxx.okta.com`).
## Step 6: Configure TextQL OIDC Settings
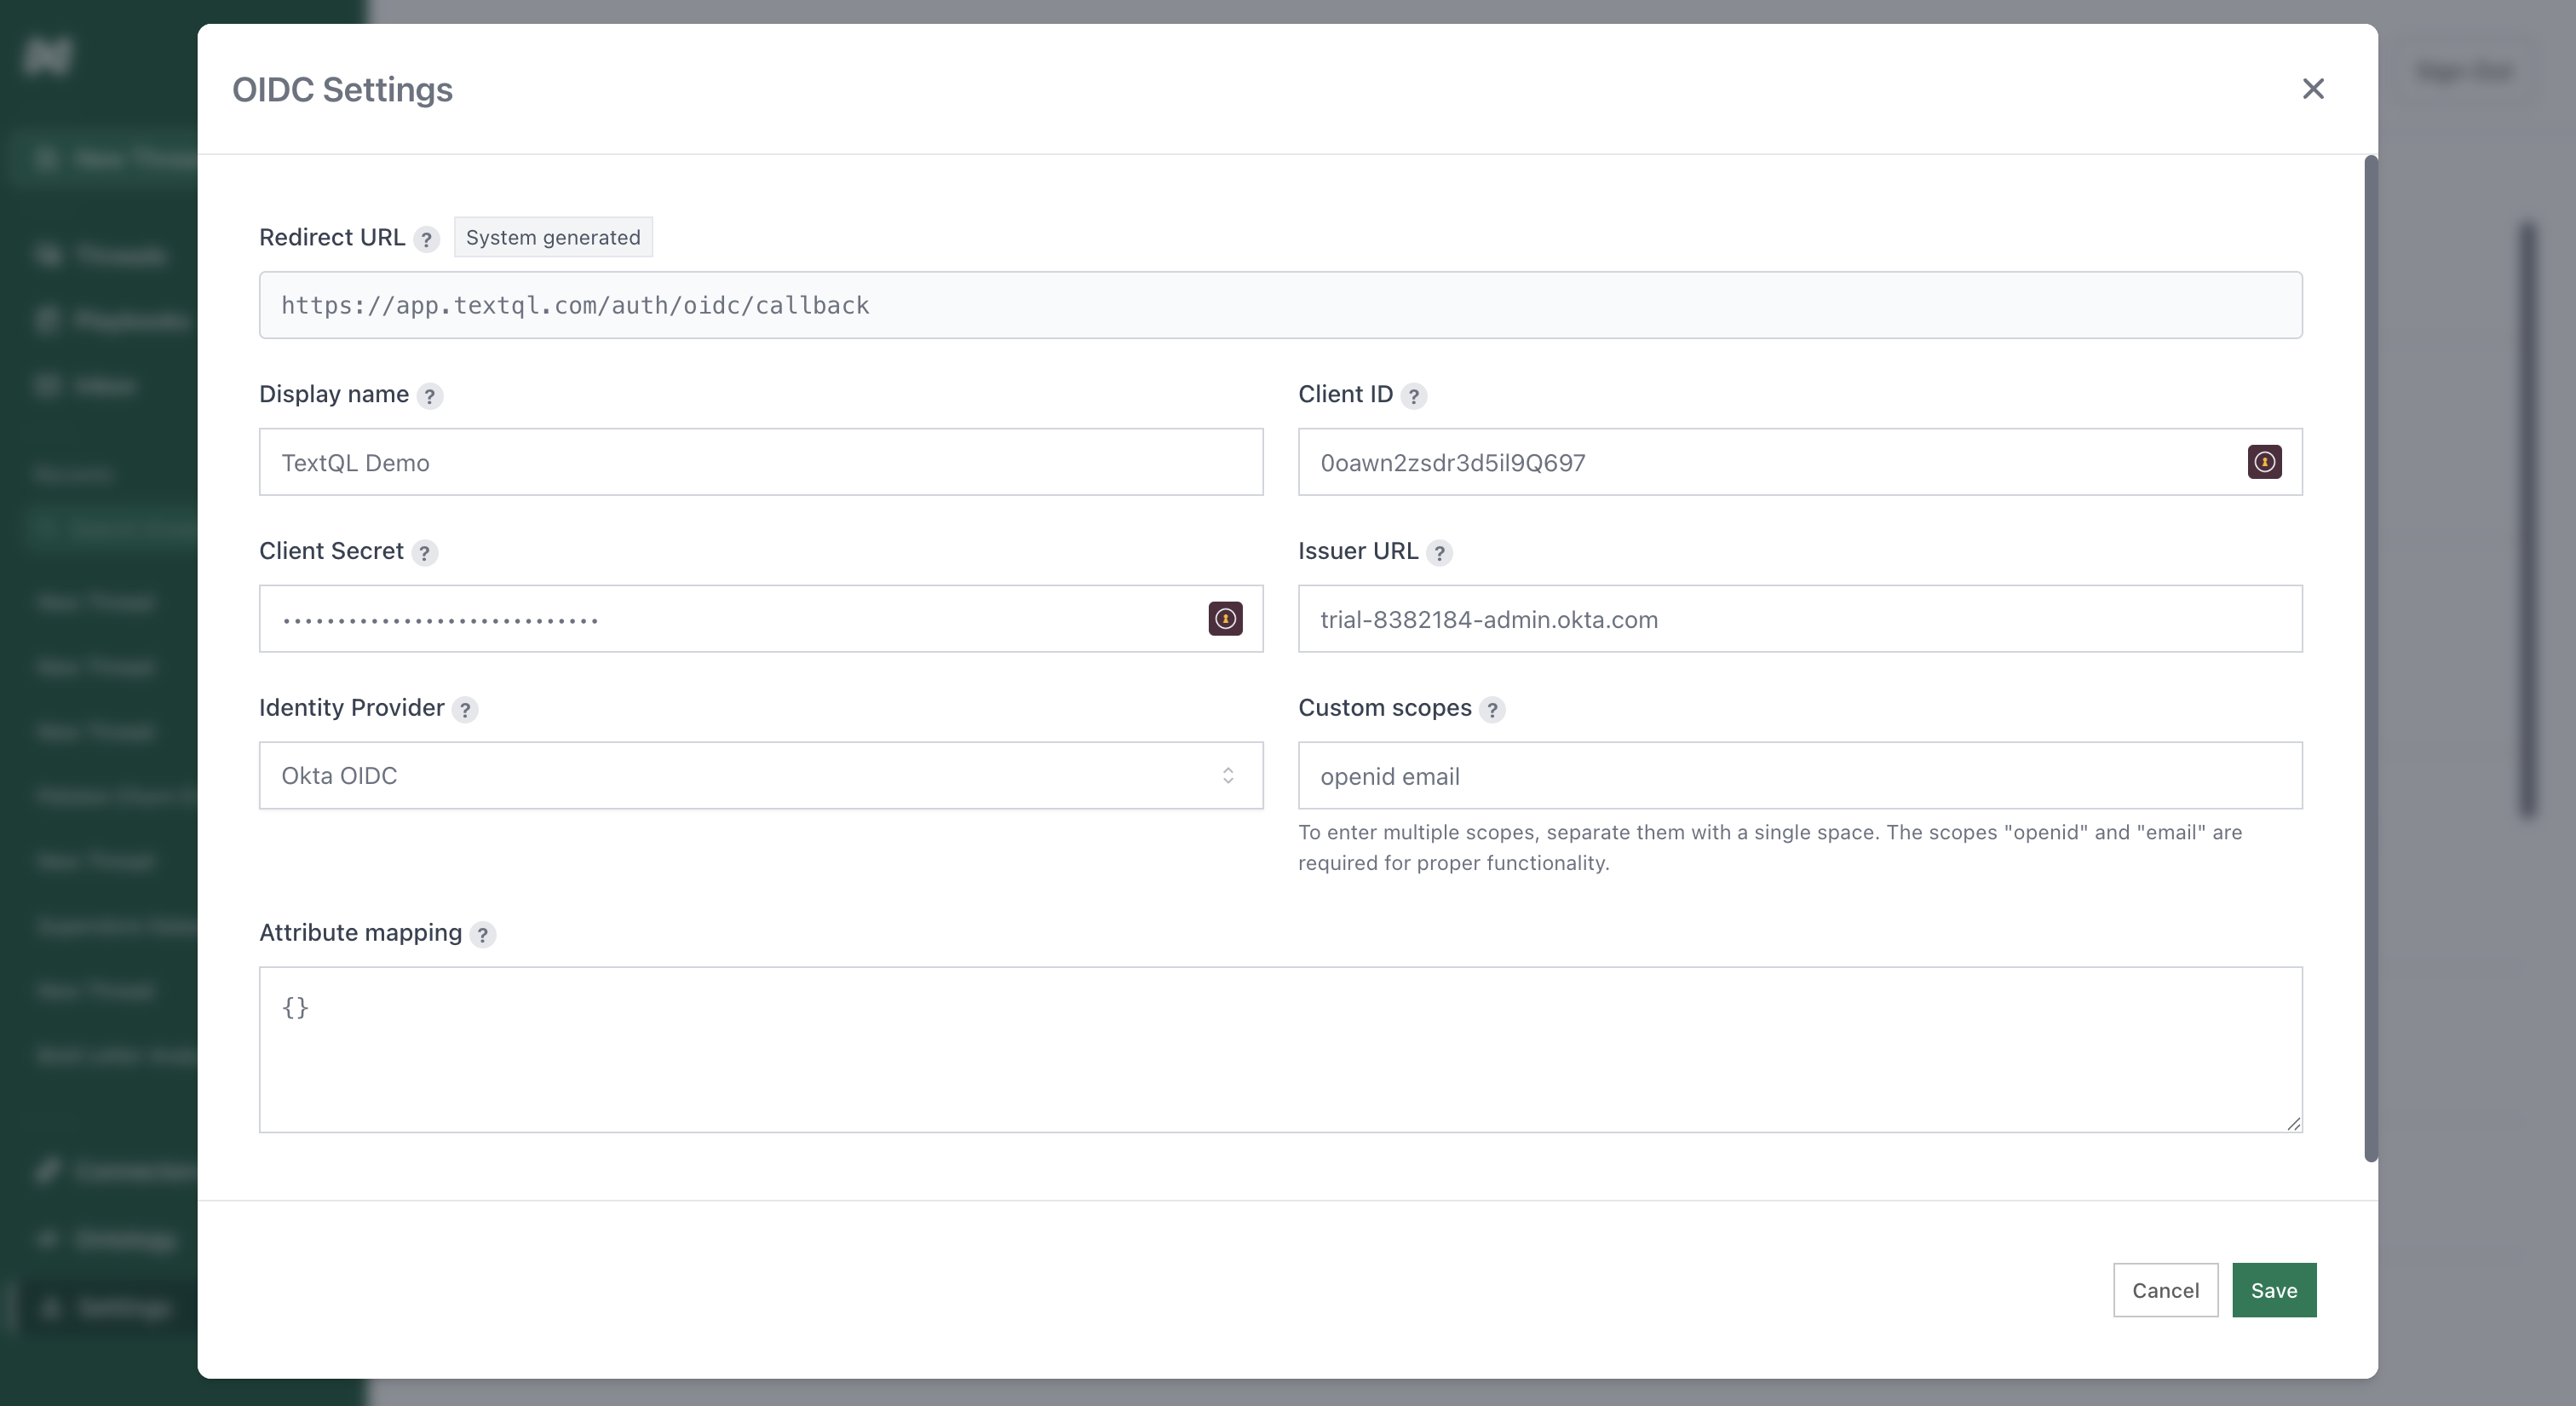
Return to TextQL and paste the values from Okta:
* **Display name**: Enter a name (e.g., "TextQL Demo")
* **Client ID**: Paste from Okta
* **Client Secret**: Paste from Okta
* **Issuer URL**: Your Okta domain
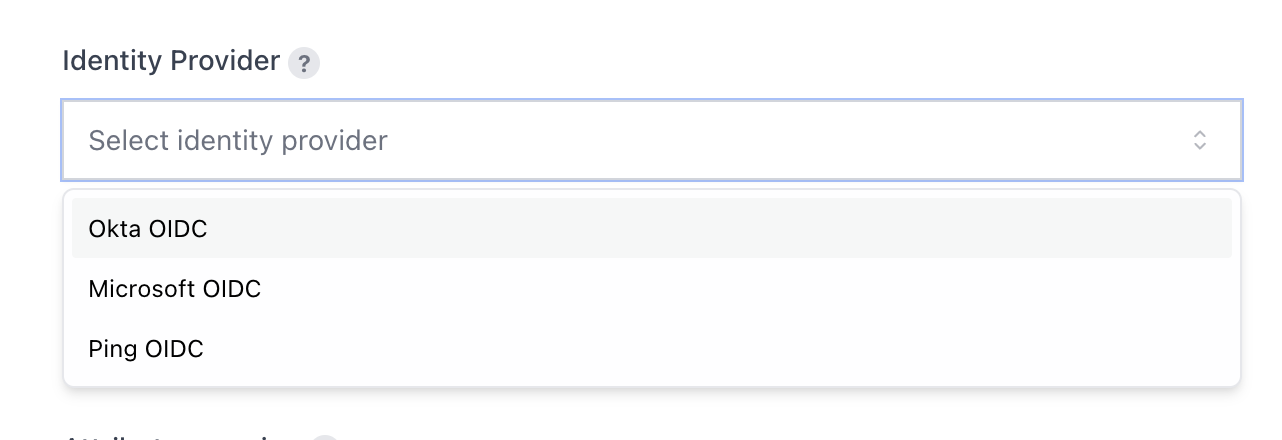
* **Identity Provider**: Select **Okta OIDC**
* **Custom scopes**: Enter `openid email`
You'll also need your **Issuer URL**, which is your Okta domain (e.g., `https://yourcompany.okta.com` or `https://dev-xxxxx.okta.com`).
## Step 6: Configure TextQL OIDC Settings
Return to TextQL and paste the values from Okta:
* **Display name**: Enter a name (e.g., "TextQL Demo")
* **Client ID**: Paste from Okta
* **Client Secret**: Paste from Okta
* **Issuer URL**: Your Okta domain
* **Identity Provider**: Select **Okta OIDC**
* **Custom scopes**: Enter `openid email`
 Click **Save** to complete the setup.