> ## Documentation Index
> Fetch the complete documentation index at: https://docs.textql.com/llms.txt
> Use this file to discover all available pages before exploring further.
# Jira Connector
> Query and explore your Jira projects, issues, and task statuses directly in TextQL.
### **1. Overview**
The Jira integration connects your Atlassian Jira workspace to TextQL, giving Ana visibility into your projects, issues, statuses, assignees, and due dates. Once configured, Ana can explore your board, surface overdue tasks, track progress across sprints, and help you build automated reports or alerts around your team's work.
Connect your Jira workspace to TextQL by providing your Atlassian subdomain and API token, then let Ana query and analyze your issues, projects, and team activity.
### **2. Prerequisites**
You'll need:
* A Jira Cloud account with admin or project-level access to the workspace you want to connect
* A Jira API token (generated from your Atlassian account settings) and your organization's Atlassian subdomain (e.g., `yourcompany.atlassian.net`)
* Admin access in TextQL to add and configure a new connector
### Which type of connection should I use?
| | **API Token** | **OAuth 2.0 (Org-level)** | OAuth 2.0 (Per-member) |
| ---------------------- | ------------------------------------------------------- | ----------------------------------------------- | -------------------------------------------------------------- |
| **Best for** | Single user or personal setup | One shared Jira connection for the whole org | Each team member connects their own Jira account |
| **Credentials needed** | API token + host URL | Client ID + Client Secret + redirect URL | Client ID + Client Secret + redirect URL per user |
| **Expiry** | Set at token creation | Managed by OAuth refresh tokens | Managed per user via OAuth refresh tokens |
| **Access level** | Tied to the individual account that generated the token | Shared access across the org under one account | Each user sees only what their own Jira account can access |
| **Recommended when** | You are the only one querying Jira in TextQL | Your team wants a single shared Jira connection | Your team needs individual, permission-scoped Jira connections |
### **3. Capabilities**
Once configured, Ana can:
* Explore your Jira projects, tasks, subtasks, and their current statuses in natural language
* Track overdue issues, upcoming due dates, and in-progress work across your board
* Analyze issue counts by assignee, priority, or issue type to understand how work is distributed
* Set up playbooks or feed agents that monitor your Jira board on a schedule and deliver updates to Slack or email
### **4. Setup Instructions**
***
### Step 1. Generate your Jira credentials
Before you begin, choose your connection type:
* API Token — best for individuals or small teams; access is tied to one person's Jira account and token. If that token expires or is revoked, the connection will break for everyone.
* OAuth (Org-level) — an admin authorizes once and all Ana users share that workspace-level connection.
* OAuth (Per-member) — each user authorizes individually and sees only what their own Jira account has access to.
If you're unsure, refer to [Which connection type should I use?](#which-connection-type-should-i-use) Then follow the instructions below for your chosen type.
1. Go to Jira and click your profile picture in the top right corner
2. Navigate to Security at the top bar.
3. Scroll down to API Tokens and click Create and manage API tokens
4. Click Create API token, give it a name, set an expiry date, and copy the token. 90 days is a reasonable expiry date.
5. In TextQL, add a new Jira connector and enter:
* **API Token:** the token you just copied
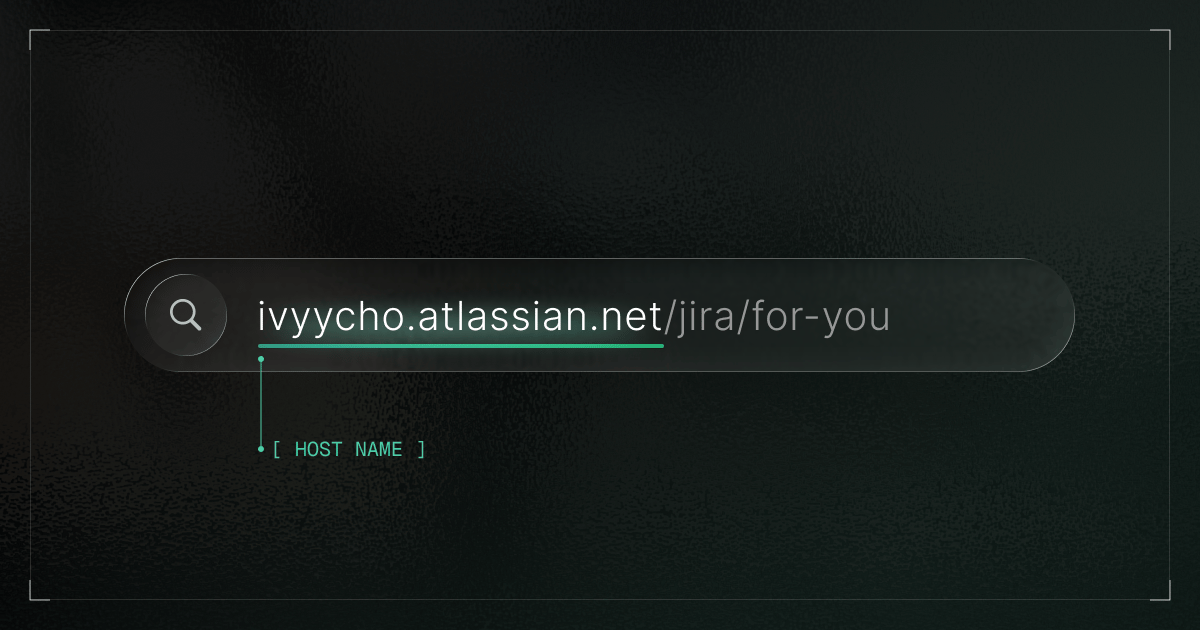
* **Host:** your Jira URL (Open Jira in your browser and look at the address bar — your host is the base URL, which will look like `https://yourname.atlassian.net`. Everything before the first `/` after `.net` is your host. For example, if your browser shows `https://acme.atlassian.net/jira/software/projects/...`, your host is `https://acme.atlassian.net`.)
 6. Click Save.
7. Copy the token value immediately once generated.
1. Go to the Atlassian Developer Console
2. Click **Create** → **OAuth 2.0 integration**
3. Fill in your app name and click create
4. In the left sidebar click **Permissions**, and add your desired permissions (See recommended permissions table below. If you are unsure, you can select all of the recommended permissions.).
| Permission / Scope | What it does | When you need it |
| --------------------------- | ---------------------------------------------------------- | ----------------------------------------------------------- |
| `read:jira-work` | Read issues, projects, comments, attachments, issue fields | Querying tickets, JQL search, syncing data into TextQL |
| `write:jira-work` | Create and update issues, comments, transitions | Creating tickets, updating status, writing back from TextQL |
| `read:jira-user` | Read user info (basic profile, accountId) | Mapping users, showing assignee/reporters, identity linking |
| `manage:jira-project` | Create/update project settings | Admin-level project manipulation |
| `manage:jira-configuration` | Modify Jira global settings | Changing workflows, fields, schemas |
| `read:me` | Read current authenticated user profile | Identifying who is connected |
5. In the left sidebar click **Distribution**
1. If multiple Jira users will connect their own accounts, you need to enable Sharing on your OAuth app. To do this, click Edit and turn Sharing on.
2. Click Save changes.
6. In the left sidebar click **Authorization**
7. Click Add and input the following redirect URL:
```
https://app.textql.com/auth/api-oauth/callbackCopy
```
8. Click Save changes.
9. Under Settings, copy your Client ID and Client Secret and enter them in the TextQL connector setup
### **Step 2: Add Jira as an API connector in TextQL**
6. Click Save.
7. Copy the token value immediately once generated.
1. Go to the Atlassian Developer Console
2. Click **Create** → **OAuth 2.0 integration**
3. Fill in your app name and click create
4. In the left sidebar click **Permissions**, and add your desired permissions (See recommended permissions table below. If you are unsure, you can select all of the recommended permissions.).
| Permission / Scope | What it does | When you need it |
| --------------------------- | ---------------------------------------------------------- | ----------------------------------------------------------- |
| `read:jira-work` | Read issues, projects, comments, attachments, issue fields | Querying tickets, JQL search, syncing data into TextQL |
| `write:jira-work` | Create and update issues, comments, transitions | Creating tickets, updating status, writing back from TextQL |
| `read:jira-user` | Read user info (basic profile, accountId) | Mapping users, showing assignee/reporters, identity linking |
| `manage:jira-project` | Create/update project settings | Admin-level project manipulation |
| `manage:jira-configuration` | Modify Jira global settings | Changing workflows, fields, schemas |
| `read:me` | Read current authenticated user profile | Identifying who is connected |
5. In the left sidebar click **Distribution**
1. If multiple Jira users will connect their own accounts, you need to enable Sharing on your OAuth app. To do this, click Edit and turn Sharing on.
2. Click Save changes.
6. In the left sidebar click **Authorization**
7. Click Add and input the following redirect URL:
```
https://app.textql.com/auth/api-oauth/callbackCopy
```
8. Click Save changes.
9. Under Settings, copy your Client ID and Client Secret and enter them in the TextQL connector setup
### **Step 2: Add Jira as an API connector in TextQL**
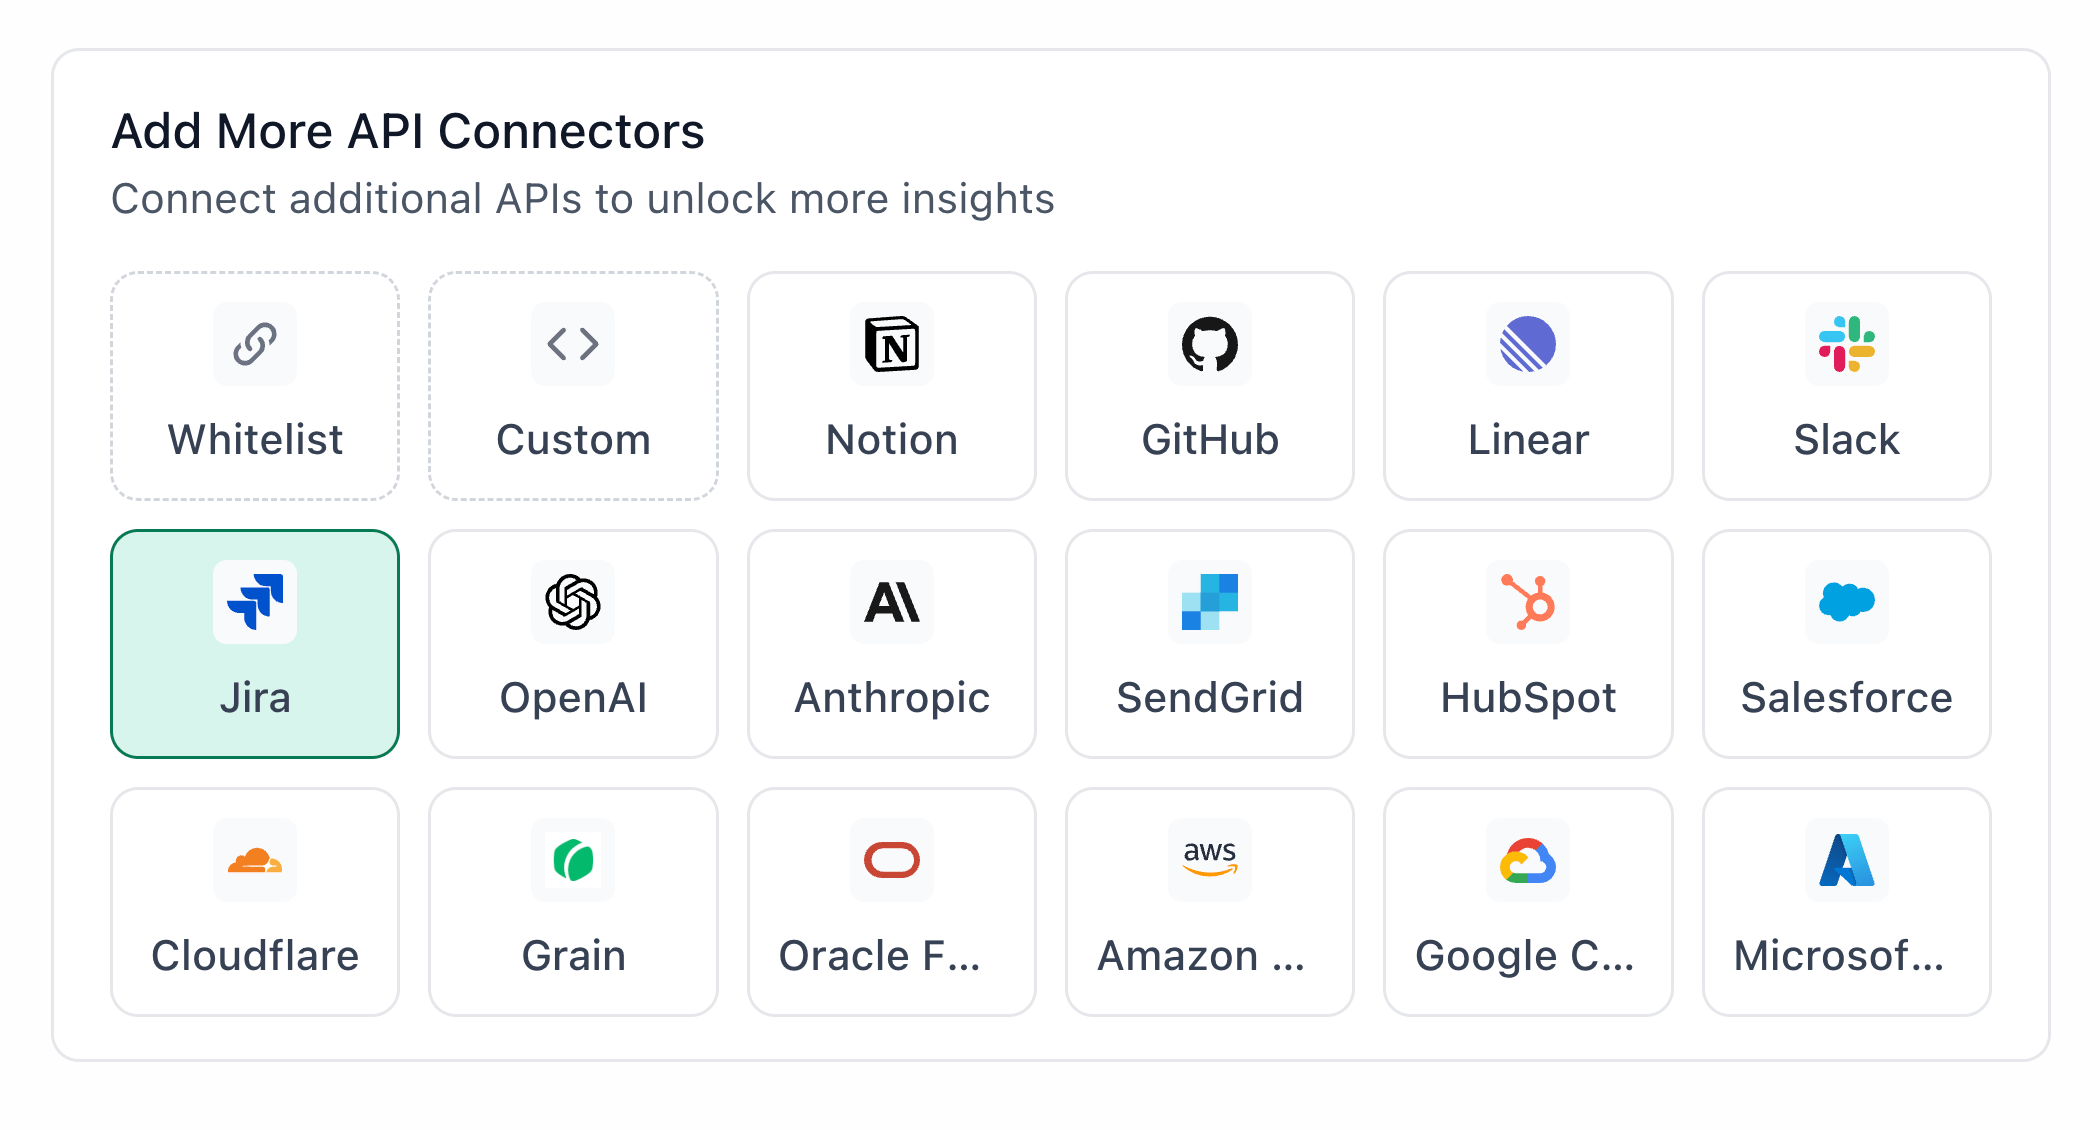 1. Go to [app.textql.com](https://app.textql.com/) and sign in.
2. In the bottom left sidebar, click **Connectors > APIs** and select Jira.
3. In the configuration panel, fill in the fields depending on your connection type:
* **API Token**
* Name (e.g. `Jira API Token`)
* Authentication type: select **API Token**
* Token: paste the token copied from Step 1
* **OAuth (Org-level or Per-member)**
* Name (e.g. `Jira OAuth`)
* Authentication type: select **OAuth (org-level)** or **OAuth (per-member)**
* Client ID and Client Secret: paste the values copied from Step 1
* OAuth Authentication: click **Authenticate** — a popup will appear asking for permissions to access your Jira account. Click **Allow**.
4. Click **Save**.
### **Step 3: Verify the connection**
Once saved, confirm the connector is active:
1. Click on the Jira connector and select Test Connection at the bottom of the panel.
* A successful setup will return Connection successful (200).
* If the test fails, refer to the [Troubleshooting](#6-troubleshooting) section for next steps.
***
### **5. Usage Examples**
Once configured, you can ask Ana:
* "Show me all open issues in my marketing project sorted by due date"
* "Which tasks are overdue or due this week?"
* "How many issues are assigned to each team member right now?"
* "Give me a summary of everything that moved to Done in the last 7 days"
* "Create a weekly Slack report tracking in-progress issues and blockers"
### **6. Troubleshooting**
| **Symptom** | **Likely Cause** | **Fix** |
| ------------------------------------------------- | ------------------------------------------------------------------------------------------------- | -------------------------------------------------------------------------------------------------------------------------------------------------------------------------------------------------------------------------------------------------- |
| Could not find OAuth client with clientId (OAuth) | Client ID or Client Secret is incorrect, missing, or the OAuth application has been reconfigured. | Confirm the Client ID and Client Secret were pasted correctly in Connectors → APIs → Jira with no extra spaces. If authentication has expired or been revoked, re-run the OAuth authentication flow in TextQL and authorize the application again. |
| Authentication failed (OAuth) | Incorrect redirect URL | In your Jira integration settings, make sure [https://app.textql.com/auth/api-oauth/callback](https://app.textql.com/auth/api-oauth/callback) is listed exactly as a redirect URL. |
| 401 Bad Credentials Error (Personal Access Token) | Invalid, revoked, or incorrectly copied API key | Generate a new API key in Jira and update the connector in TextQL. |
| Ana returns no results (OAuth) | Insufficient permissions | Confirm read:jira-work and read:jira-user are included in your OAuth app's permissions |
### **7. Security Notes**
* API tokens expire based on the expiry date you set at creation — you will need to generate a new token and update the connector in TextQL when it expires
* The recommended scopes grant read and write access to Jira work items; if you want Ana to be strictly read-only, limit scopes to `read:jira-work` and `read:jira-user`
* The integration uses API token or OAuth 2.0 authentication — Ana can only do what the scopes you granted allow, so limiting scopes is the safest way to control access
* Do not share API keys, client secrets, or OAuth credentials in email, chat, tickets, or other unsecured locations.
* To revoke access, go to **Jira** → **Profile** → **Security** → **API Tokens** and delete the relevant token, or for OAuth apps, remove the integration from your Atlassian Developer Console
* For more details on how Jira handles API authentication and permissions, refer to [Atlassian’s official support docs](https://developer.atlassian.com/).
***
### **Need Help?**
For further assistance, please contact [support@textql.com](mailto:support@textql.com).
### **Privacy Policy**
For information about how we handle your data and protect your privacy, please review our [Privacy Policy](https://textql.com/privacy).
1. Go to [app.textql.com](https://app.textql.com/) and sign in.
2. In the bottom left sidebar, click **Connectors > APIs** and select Jira.
3. In the configuration panel, fill in the fields depending on your connection type:
* **API Token**
* Name (e.g. `Jira API Token`)
* Authentication type: select **API Token**
* Token: paste the token copied from Step 1
* **OAuth (Org-level or Per-member)**
* Name (e.g. `Jira OAuth`)
* Authentication type: select **OAuth (org-level)** or **OAuth (per-member)**
* Client ID and Client Secret: paste the values copied from Step 1
* OAuth Authentication: click **Authenticate** — a popup will appear asking for permissions to access your Jira account. Click **Allow**.
4. Click **Save**.
### **Step 3: Verify the connection**
Once saved, confirm the connector is active:
1. Click on the Jira connector and select Test Connection at the bottom of the panel.
* A successful setup will return Connection successful (200).
* If the test fails, refer to the [Troubleshooting](#6-troubleshooting) section for next steps.
***
### **5. Usage Examples**
Once configured, you can ask Ana:
* "Show me all open issues in my marketing project sorted by due date"
* "Which tasks are overdue or due this week?"
* "How many issues are assigned to each team member right now?"
* "Give me a summary of everything that moved to Done in the last 7 days"
* "Create a weekly Slack report tracking in-progress issues and blockers"
### **6. Troubleshooting**
| **Symptom** | **Likely Cause** | **Fix** |
| ------------------------------------------------- | ------------------------------------------------------------------------------------------------- | -------------------------------------------------------------------------------------------------------------------------------------------------------------------------------------------------------------------------------------------------- |
| Could not find OAuth client with clientId (OAuth) | Client ID or Client Secret is incorrect, missing, or the OAuth application has been reconfigured. | Confirm the Client ID and Client Secret were pasted correctly in Connectors → APIs → Jira with no extra spaces. If authentication has expired or been revoked, re-run the OAuth authentication flow in TextQL and authorize the application again. |
| Authentication failed (OAuth) | Incorrect redirect URL | In your Jira integration settings, make sure [https://app.textql.com/auth/api-oauth/callback](https://app.textql.com/auth/api-oauth/callback) is listed exactly as a redirect URL. |
| 401 Bad Credentials Error (Personal Access Token) | Invalid, revoked, or incorrectly copied API key | Generate a new API key in Jira and update the connector in TextQL. |
| Ana returns no results (OAuth) | Insufficient permissions | Confirm read:jira-work and read:jira-user are included in your OAuth app's permissions |
### **7. Security Notes**
* API tokens expire based on the expiry date you set at creation — you will need to generate a new token and update the connector in TextQL when it expires
* The recommended scopes grant read and write access to Jira work items; if you want Ana to be strictly read-only, limit scopes to `read:jira-work` and `read:jira-user`
* The integration uses API token or OAuth 2.0 authentication — Ana can only do what the scopes you granted allow, so limiting scopes is the safest way to control access
* Do not share API keys, client secrets, or OAuth credentials in email, chat, tickets, or other unsecured locations.
* To revoke access, go to **Jira** → **Profile** → **Security** → **API Tokens** and delete the relevant token, or for OAuth apps, remove the integration from your Atlassian Developer Console
* For more details on how Jira handles API authentication and permissions, refer to [Atlassian’s official support docs](https://developer.atlassian.com/).
***
### **Need Help?**
For further assistance, please contact [support@textql.com](mailto:support@textql.com).
### **Privacy Policy**
For information about how we handle your data and protect your privacy, please review our [Privacy Policy](https://textql.com/privacy).