Overview
TextQL’s context editor is your central hub for creating and managing all context documents. It provides a user-friendly interface for writing context, uploading files, and organizing your organization’s knowledge base.Access the Context Editor: Navigate to the Context page from the left sidebar in your TextQL workspace.
The Context Library
The Context Library is where all your context documents live. It provides a searchable, organized view of all context across your organization.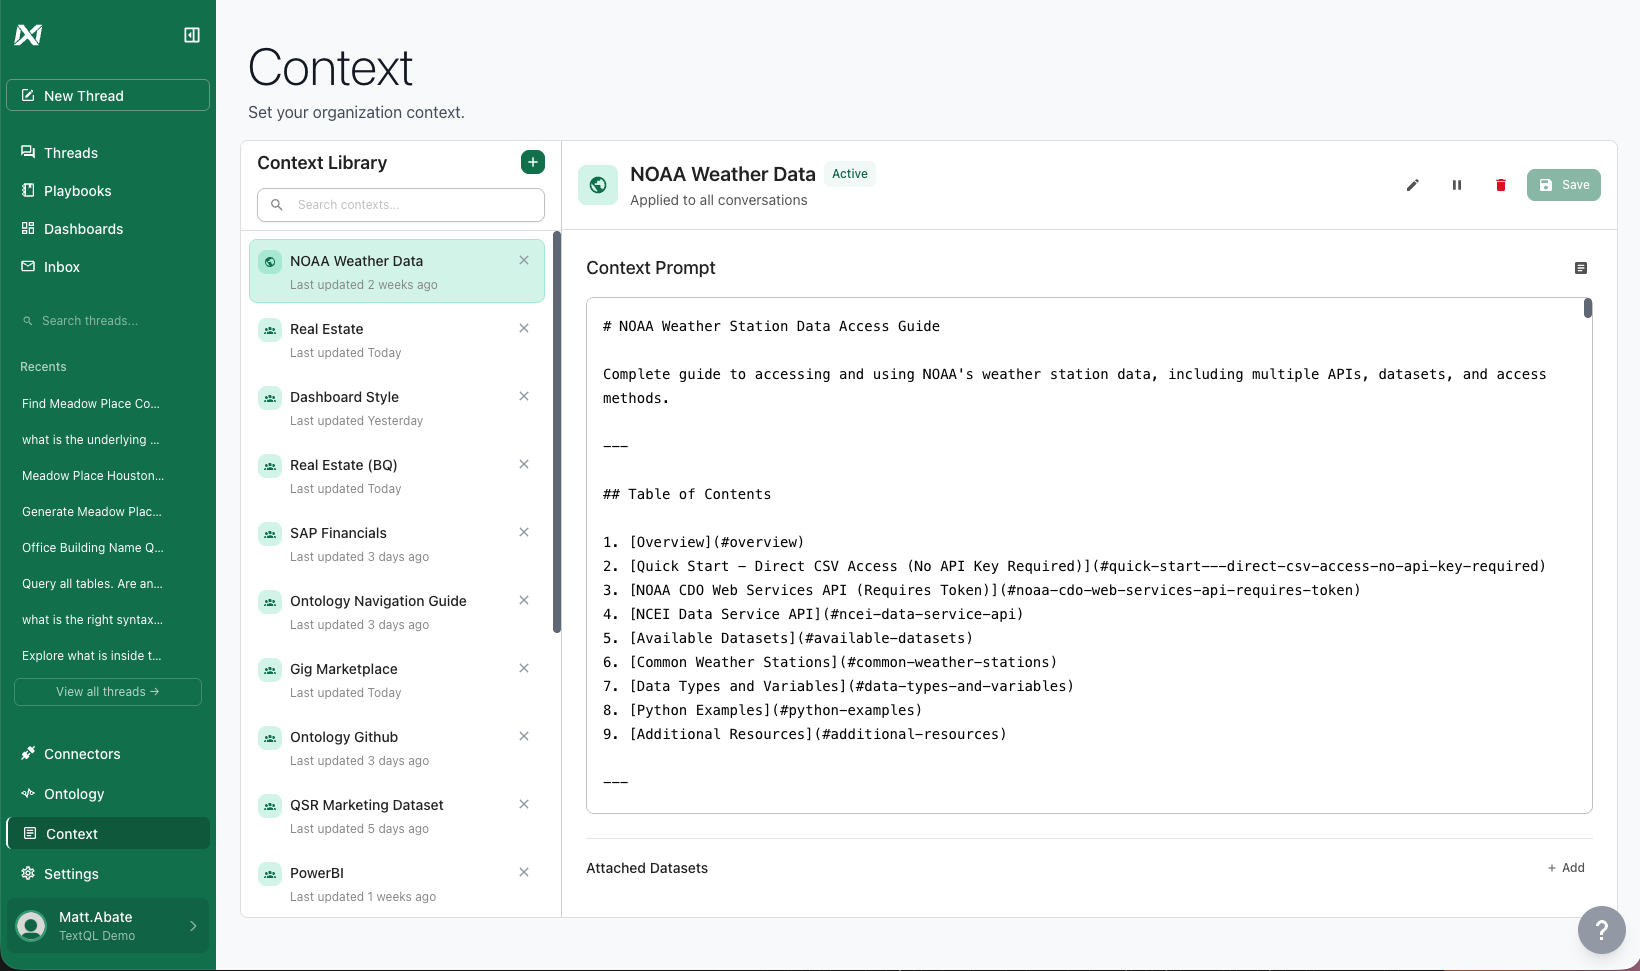
Creating a New Context Document
Click Add Context
Click the + (plus) button in the Context Library to open the create context dialog.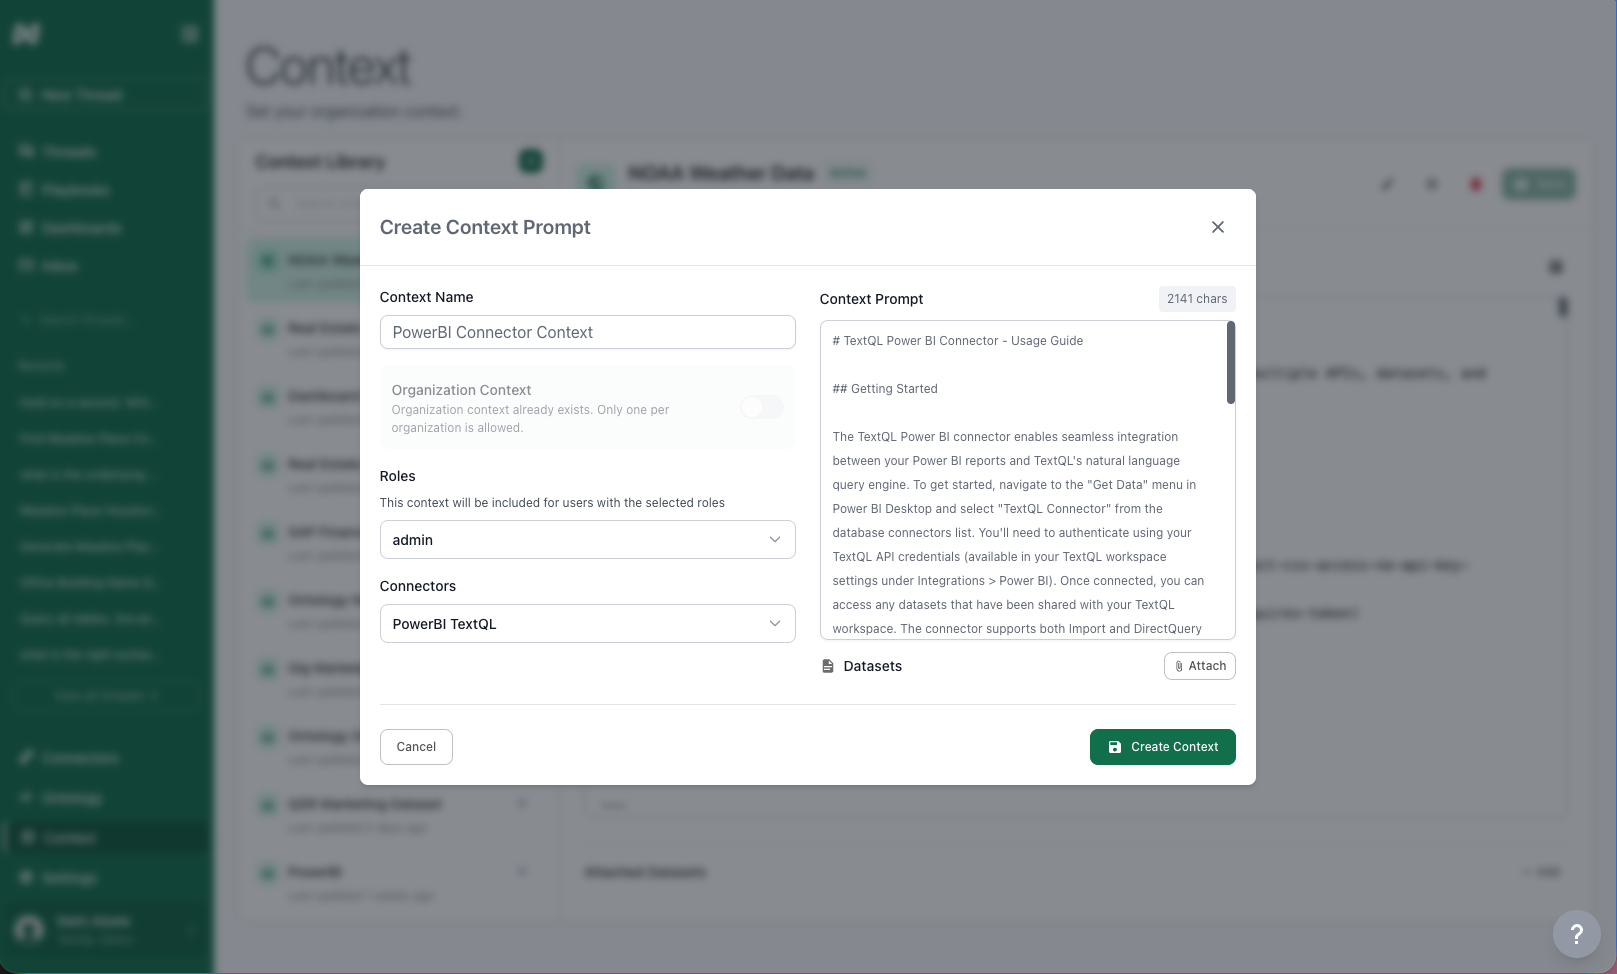
Give It a Name
Give your context document a descriptive name that clearly indicates its purpose, like “LinkedIn Analytics Warehouse” or “Sales Team Best Practices”.
Set the Scope
Choose where this context should apply:Organization Context
- Applies to everyone in your organization
- Only one organization context document is allowed
- If one already exists, this option will be disabled
- Select one or more roles that should see this context
- Users must have the selected role to access this context
- Select one or more data connectors
- Context applies when users are actively chatting with the selected connector
- Select both roles AND connectors
- Context applies only when a user with the specified role queries the specified connector
- This is the most targeted form of context scoping
Write Your Context
Enter your context content in the plain text editor. No special formatting or structure is required — just write naturally. You can also ask Ana to write context for you (see Best Practices below).
Attach Datasets (Optional)
Click the + Attach button under “Datasets” to link relevant data files to this context.Attached datasets help Ana understand the structure and content of your data when this context is active.
Uploading Files
The context editor supports uploading any file type. Here are some common examples:Documents
PDFs, Microsoft Word, markdown, or any text-based documentation.
Slide Decks
PowerPoint presentations, Keynote files, or slide decks saved as PDF.
Data Files
CSVs, Excel spreadsheets, Parquet files, Oracle Primavera P6 exports, and more.
Anything Else
Any other file type your team works with — just upload it.
How to Upload Files
- Click the Upload or Attach button in the context editor
- Select your file from your computer
- Wait for the upload to complete
- The file content is automatically processed and incorporated into the context
Editing Existing Context
To edit a context document:- Find the document in the Context Library
- Click the Edit icon (pencil) next to the document name
- Make your changes in the editor
- Click Save to update the context
Remember to Save: After making changes, click Save to apply them. Saved changes apply to all new chats immediately. Existing chats may need to be refreshed.
Managing Context Documents
Click on any context document in the library to view its full content, scope, attached datasets, and status. From there you can edit, pause, or delete the document. Pausing a context document temporarily disables it without deleting it — useful for testing or temporarily removing context without losing your work.Best Practices
Get Ana to Write Your Context
Get Ana to Write Your Context
The most effective way to create context is to have Ana write it for you. After a successful chat where Ana performed an action the way you wanted, ask her to turn those instructions into a context document. We’ve found that Ana follows instructions best when she wrote them herself based on a real, successful interaction.
Keep Context Focused
Keep Context Focused
Each context document should have a clear, single purpose. Don’t try to cram everything into one document.Good: “Sales Team Terminology”
Bad: “Everything About Our Company”
Use Descriptive Names
Use Descriptive Names
Name context documents so anyone in your organization can understand their purpose at a glance.
Update Regularly
Update Regularly
Context should evolve with your organization. Review and update context documents quarterly or when business processes change.
Test Your Context
Test Your Context
After creating context, test it by chatting with Ana to ensure she’s interpreting it correctly.
What’s Next?
Context Scoping
Learn how to apply context at different levels and understand scoping rules
GitHub Integration
Manage context documents through version-controlled GitHub repositories