Quick Start
The fastest way to embed Ana is an iframe with an API key.1
Create an API key
Go to Settings → Developers and click + Create API Key. Copy it immediately — the full key is only shown once.
2
Test the embed URL
Open this URL in an incognito window to confirm the key works:
3
Add the iframe to your app
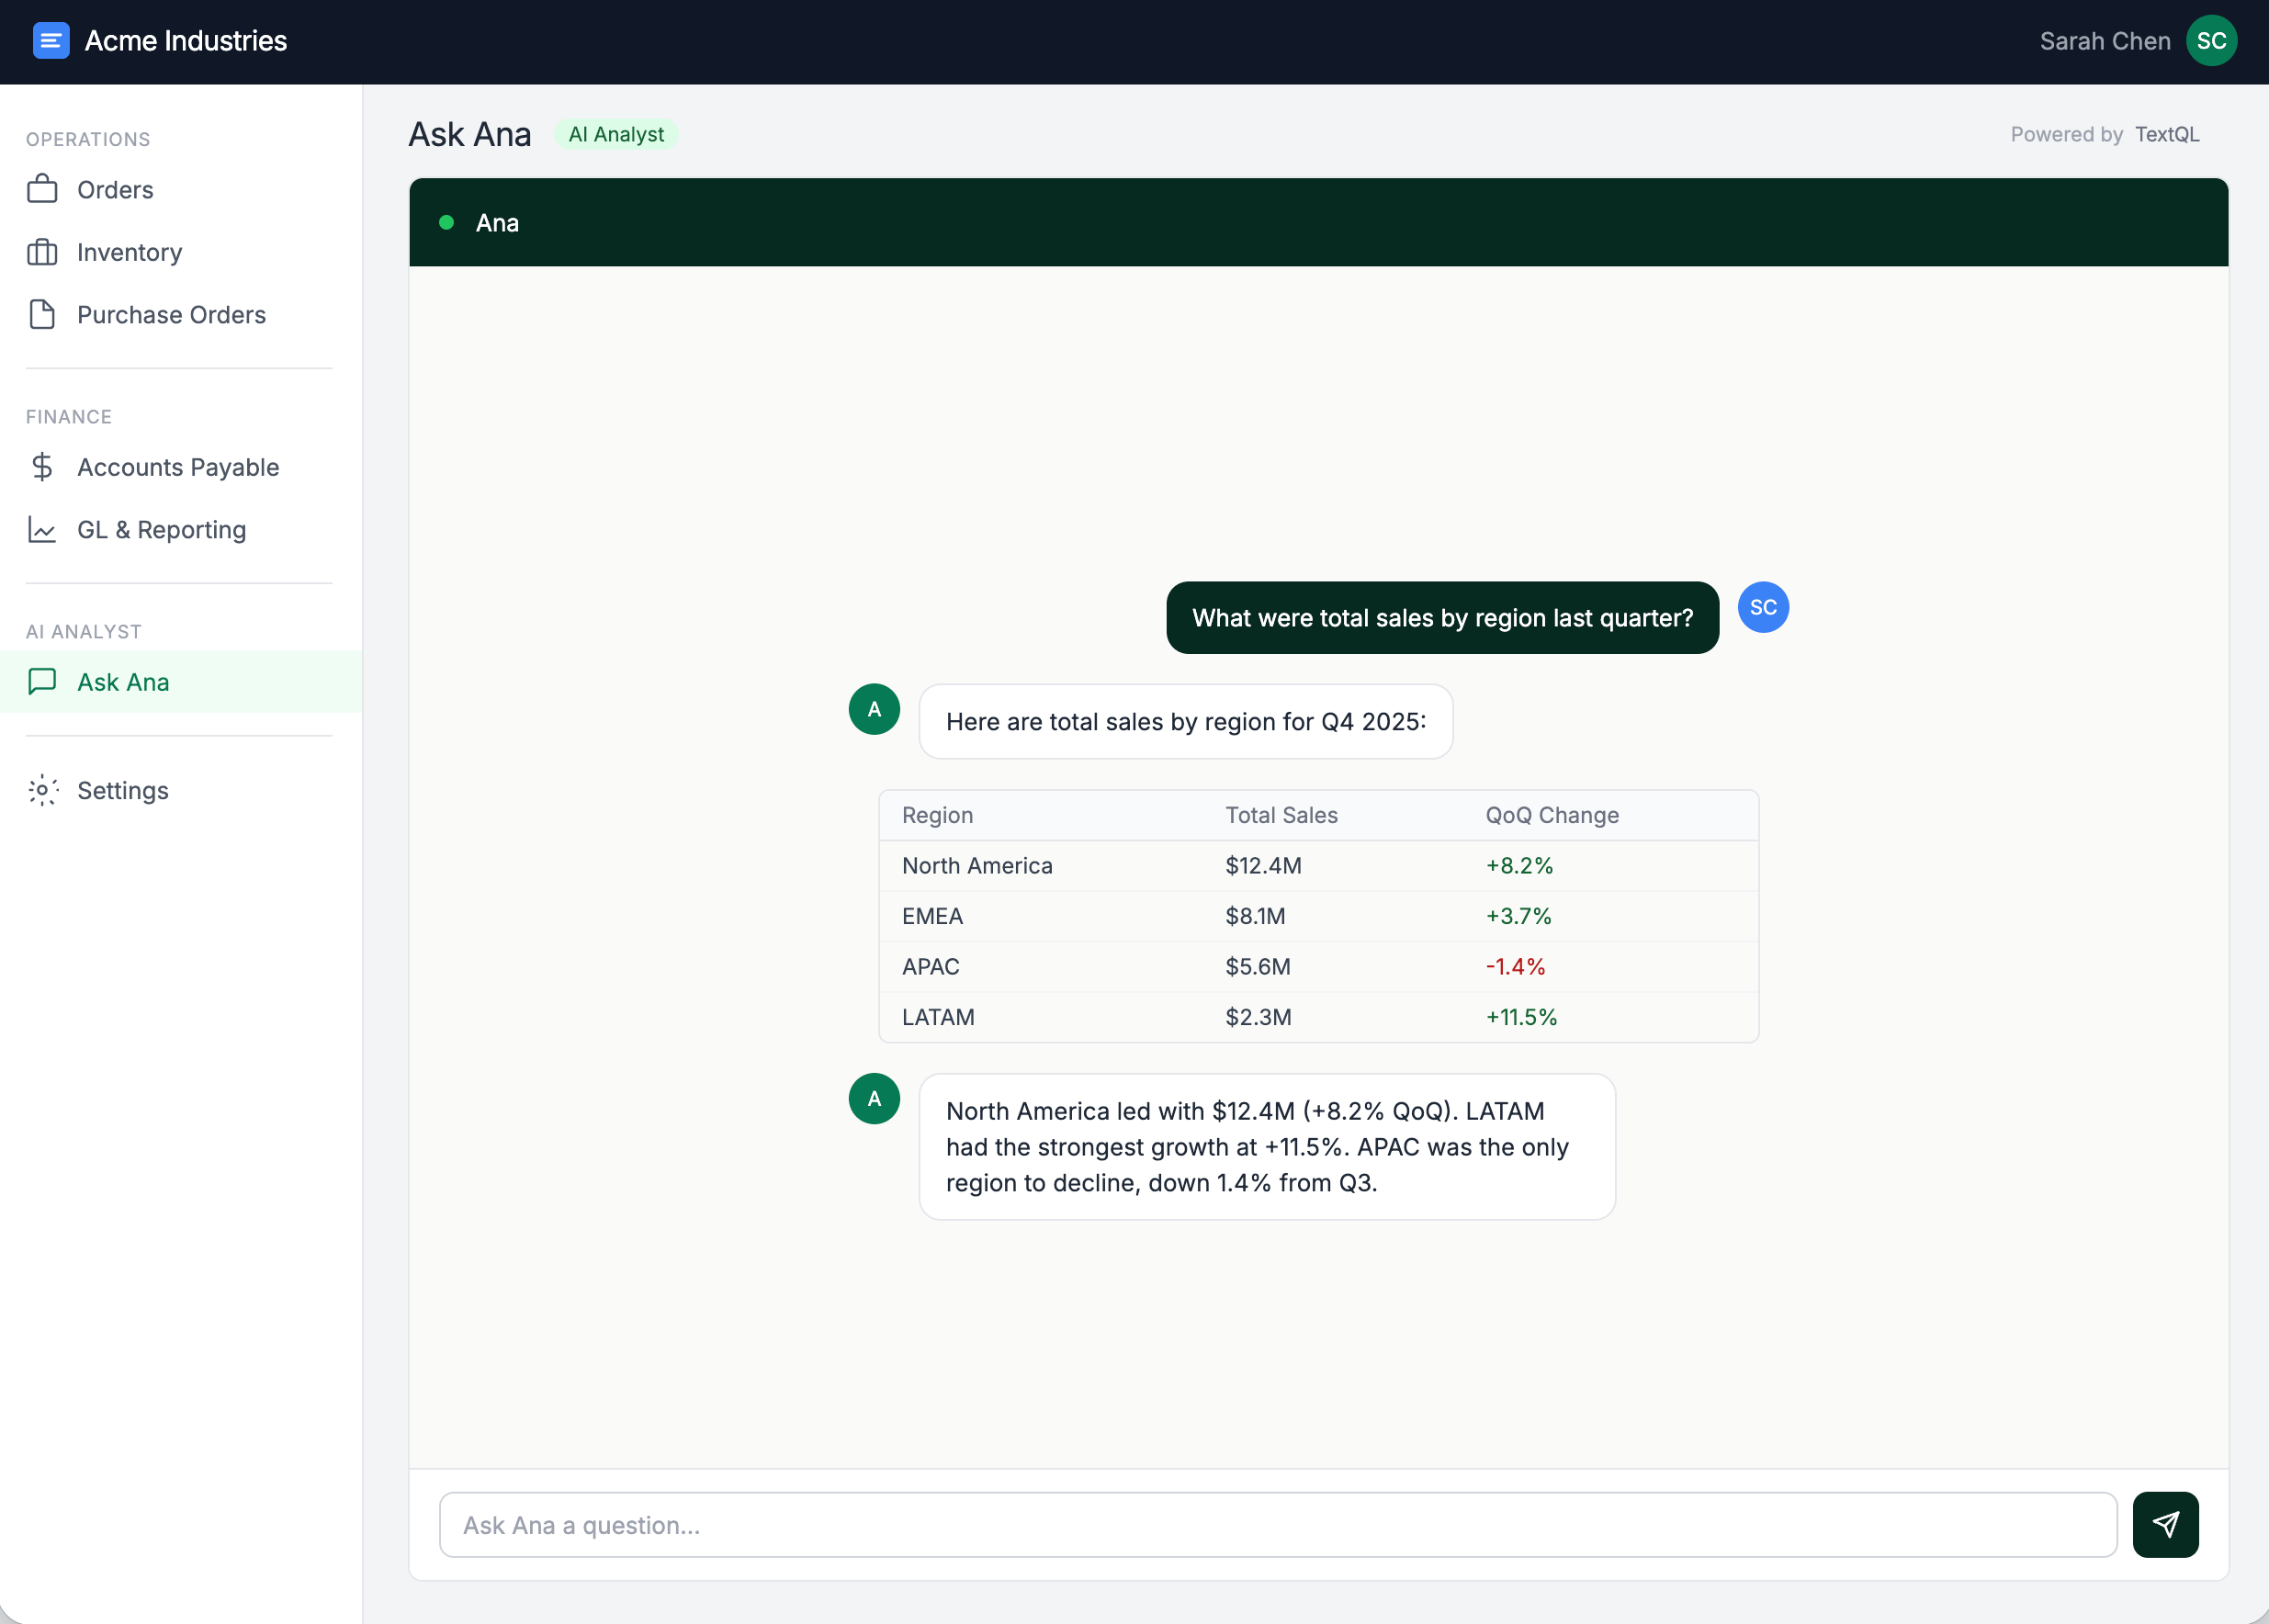
Ana embedded in an application
Authentication
Personal API Keys vs Service Accounts
TextQL has two types of identities for programmatic access:
Personal API Keys — Go to Settings → Developers → API Keys and click + Create API Key. You can optionally set a key name, expiry (e.g.,
3600 for 1 hour), and assumed roles.
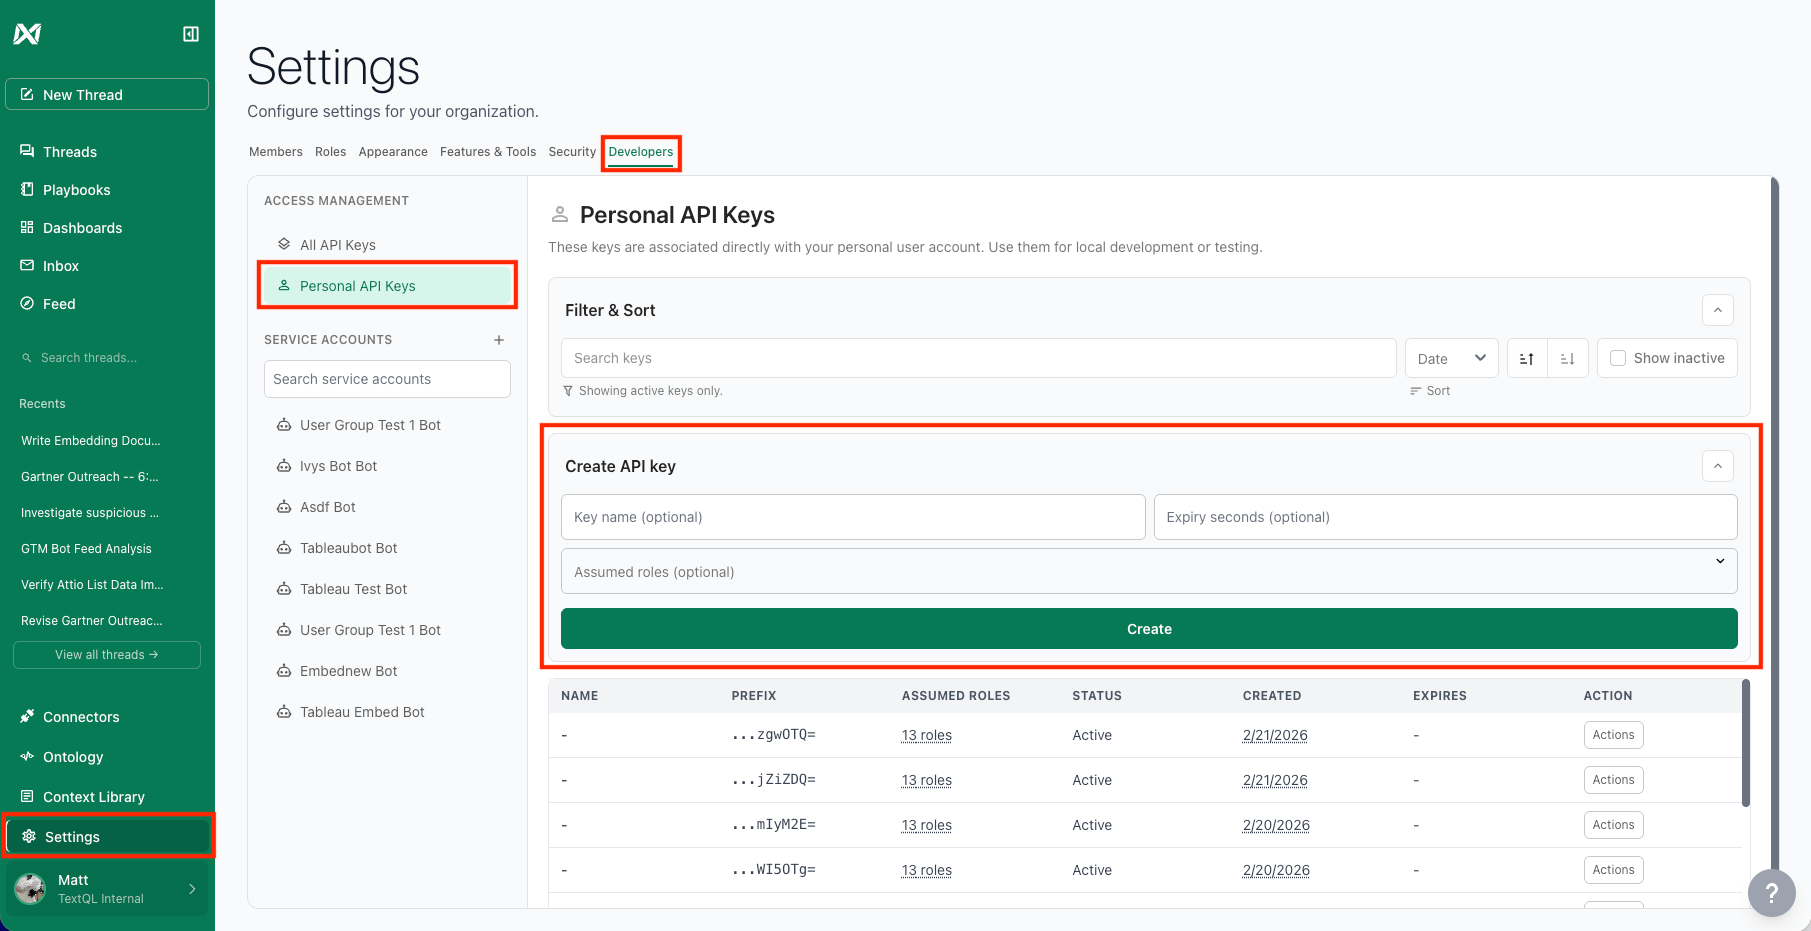
Personal API Keys
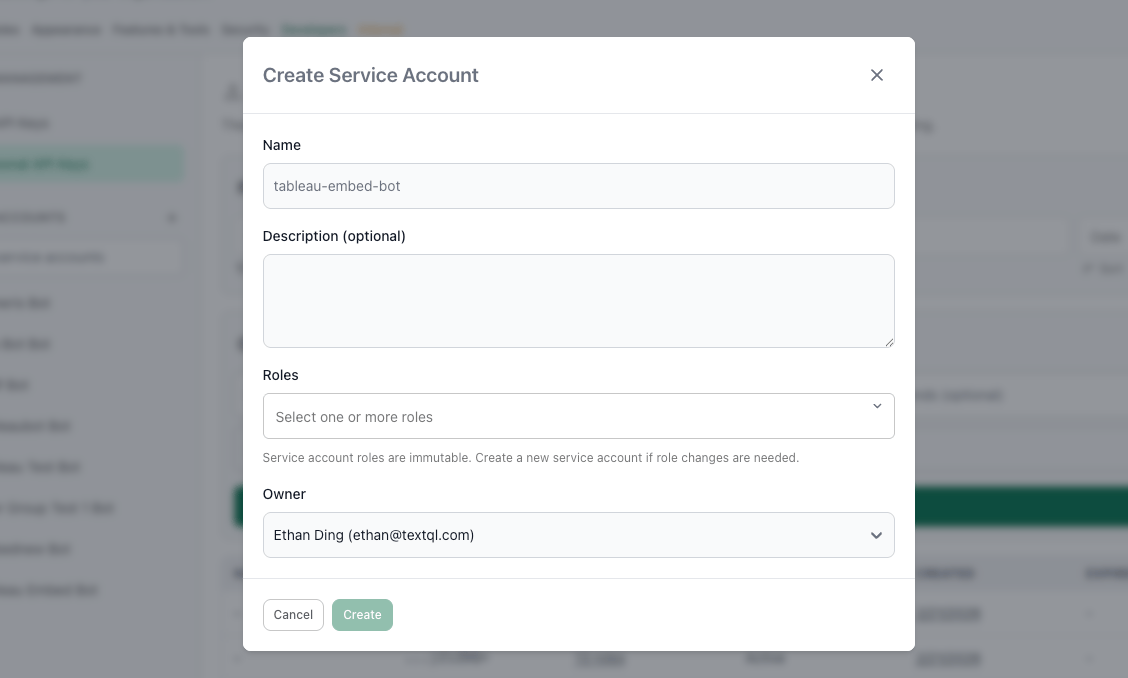
Create service account modal
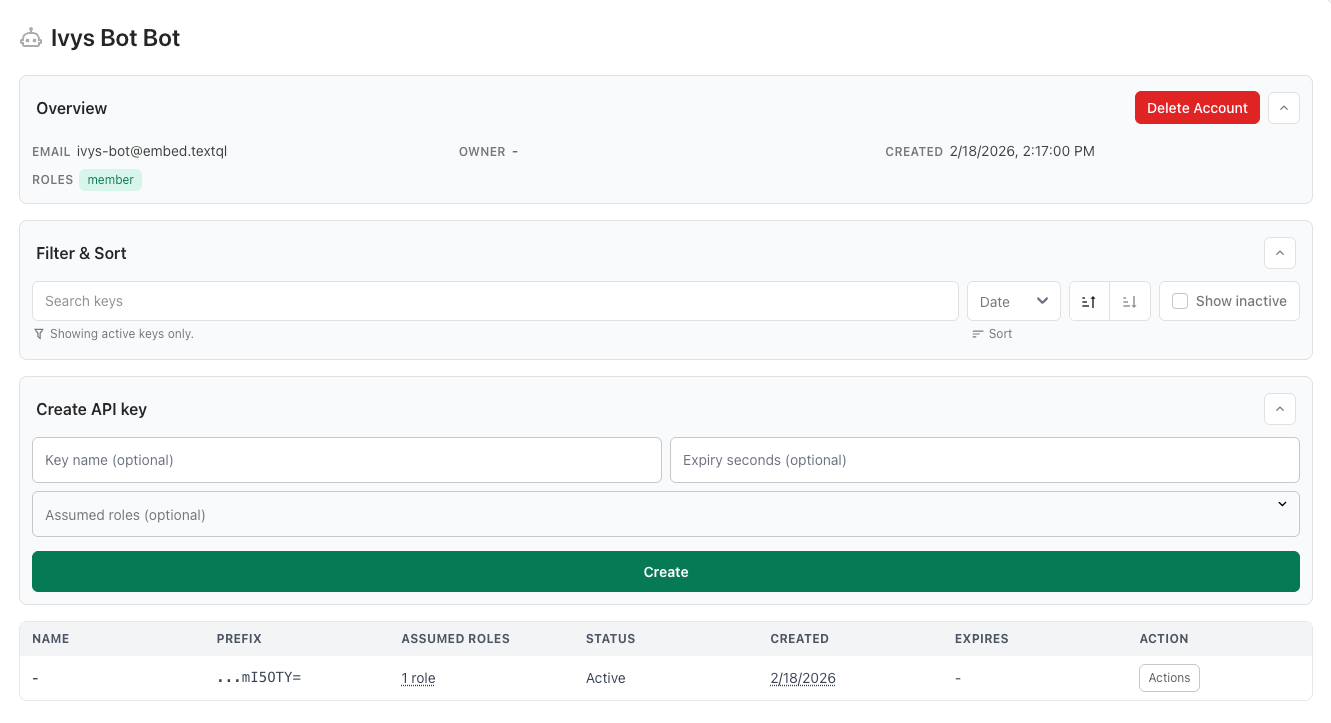
Service account detail page
Access Control
How Roles Work
Roles control which connectors and context an API key can access. The embedded experience shows exactly the data the key’s identity has access to. Context can be scoped at three levels: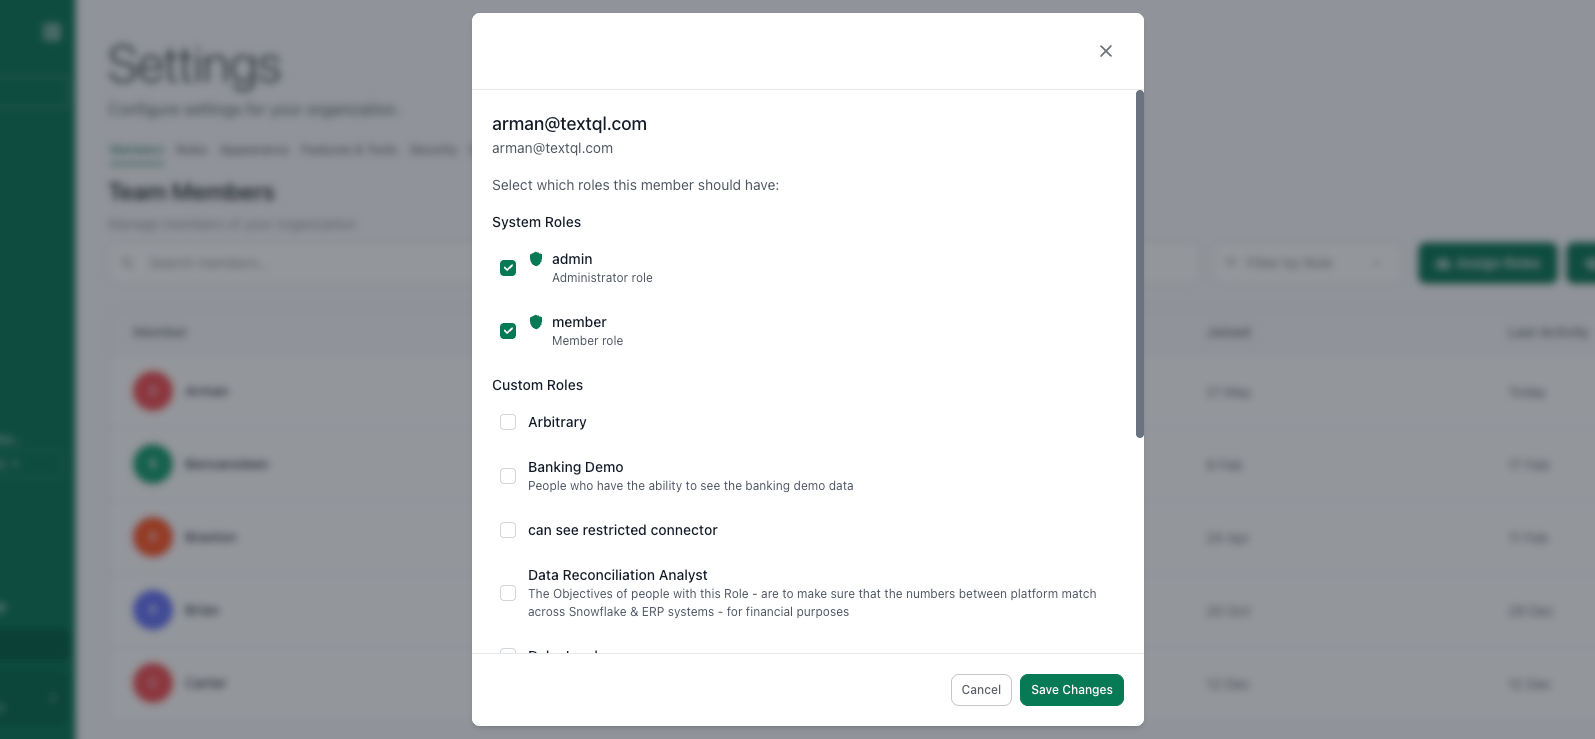
Settings → Roles
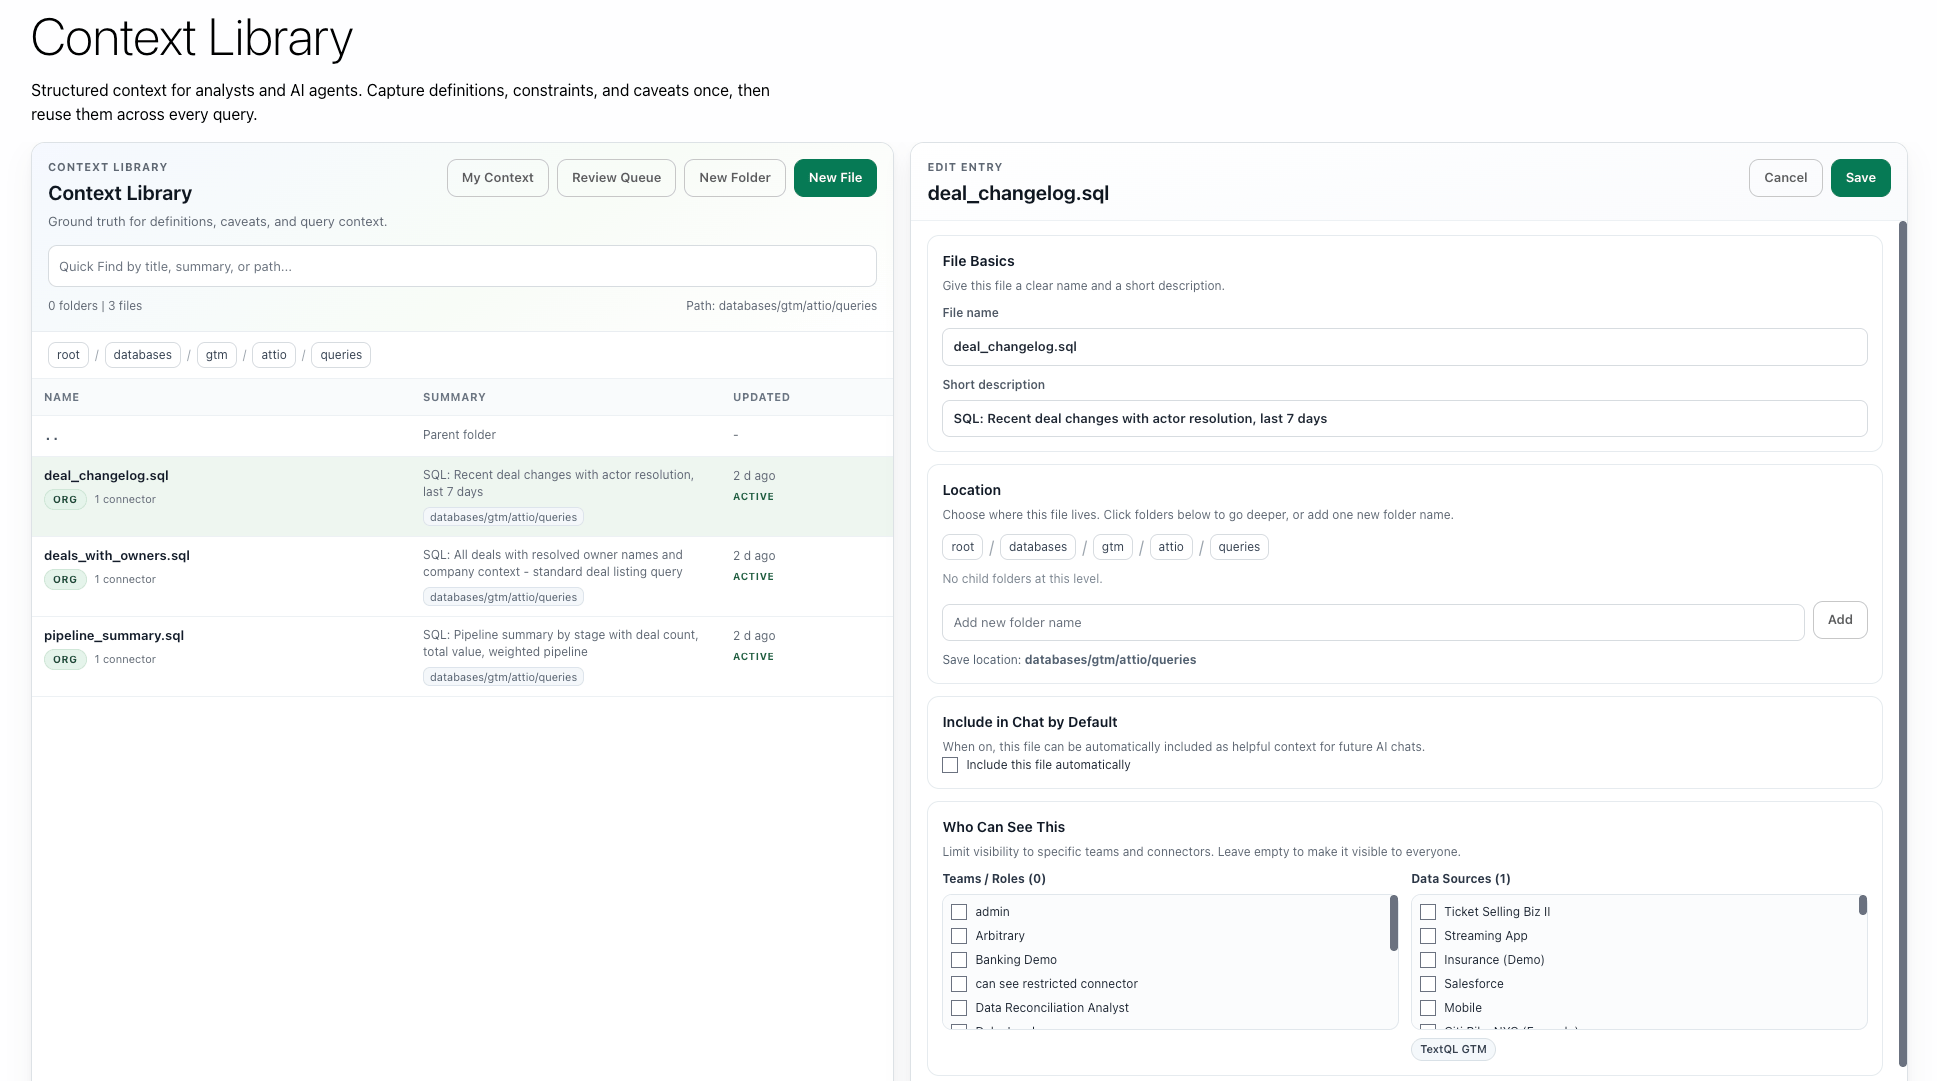
Assigning Roles to context files in Ontology
Programmatic Role Scoping
Your backend can mint scoped API keys on demand with the Create API Key endpoint — no separate TextQL user accounts needed per role or per tenant. Step 1 — List available roles:key — the full bearer secret, shown exactly once — plus
an api_key object with the key’s id and metadata. Use key as the
Authorization: Bearer credential for API calls, or as the ?authKey= value
for embed URLs. Revoke a key before it expires with
Revoke API Key.
Row-level security with clientId: the clientId string is stored on the
key and, when it is a JSON object string, saved TQL queries can read each field
as _tql.client_attributes_json.<field>. Mint one key per tenant or end-user
session and a single saved query serves all of them — each key only ever sees
its own rows:
SSO and Role Mapping
For organizations using SSO (Okta, Azure AD, Ping Identity), roles can be mapped from your identity provider’s groups so new users are automatically assigned the correct TextQL role on first login.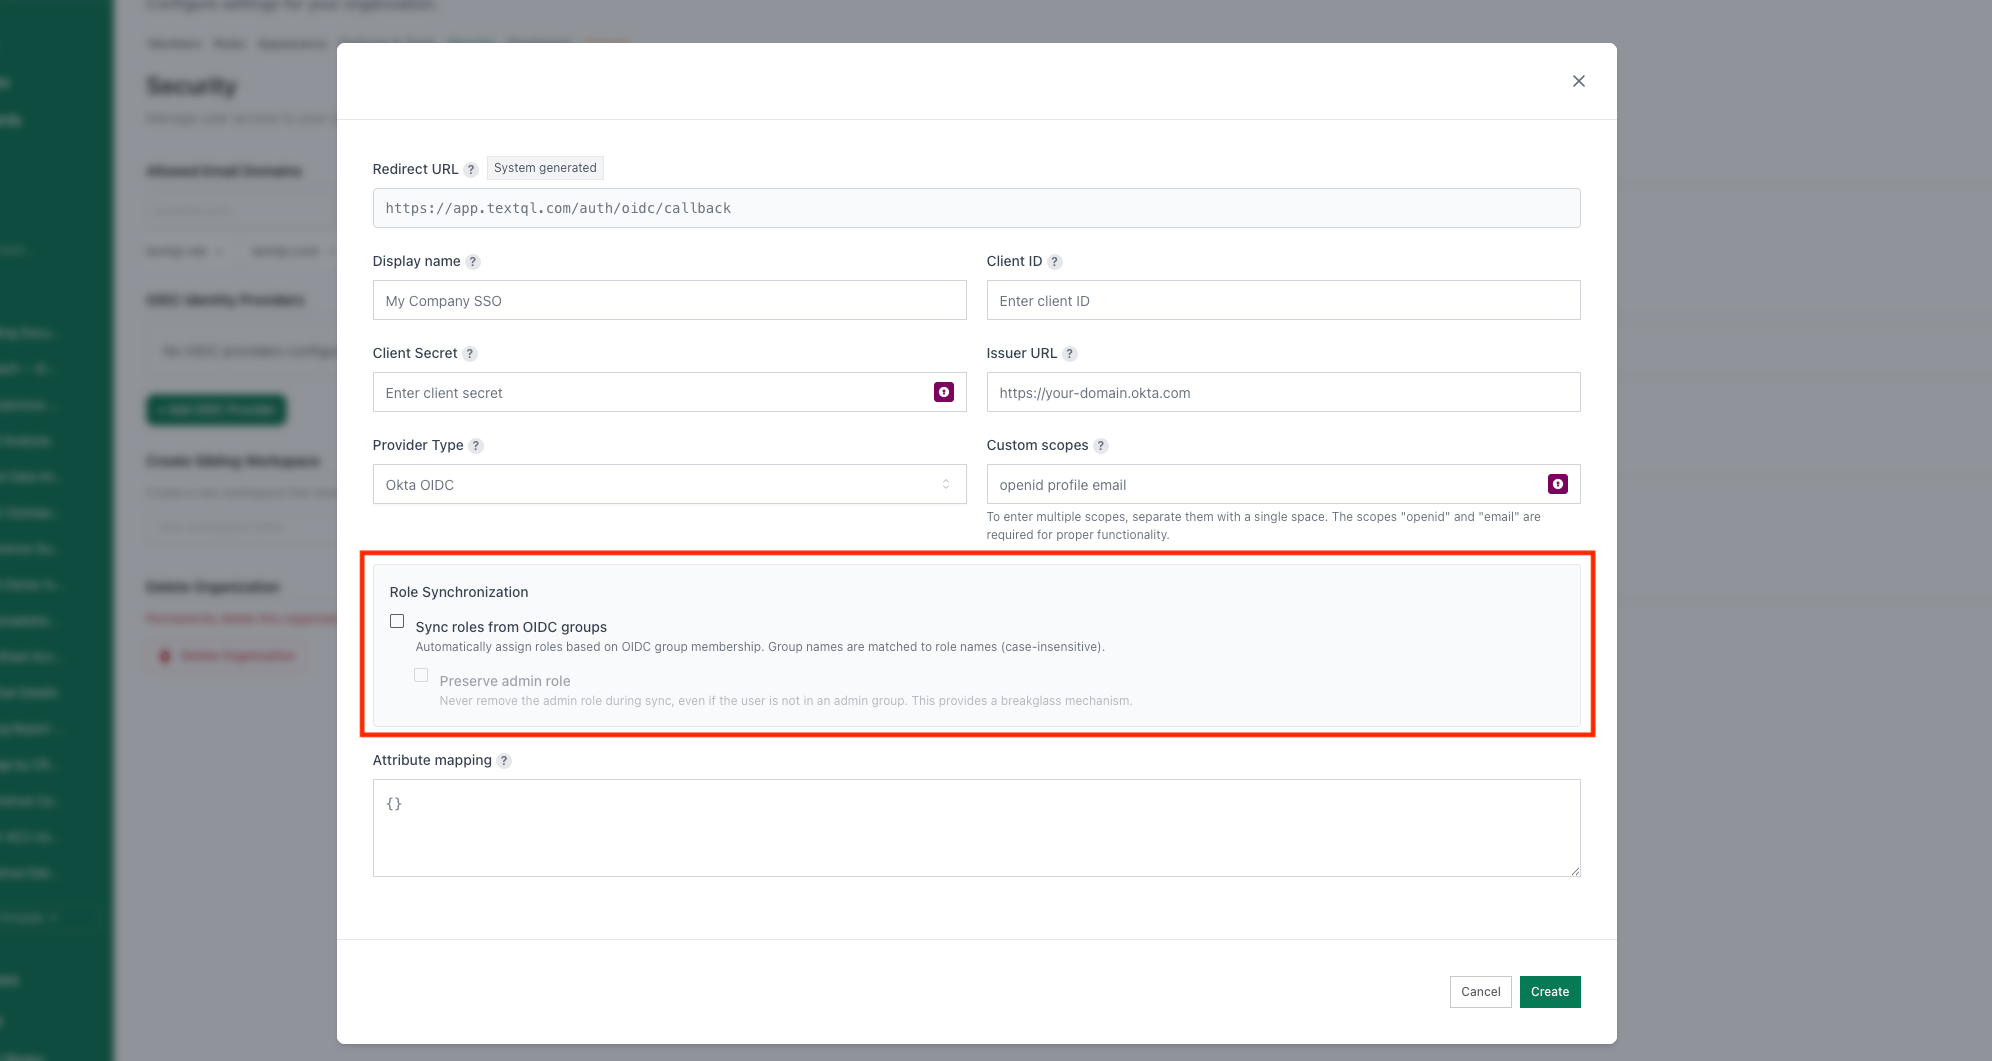
Settings → Security → OIDC Identity Providers
Embedding via iframe
Iframe Attributes
Query Parameters
All parameters are optional. Absent parameters fall back to the org/role defaults configured in TextQL settings. Authentication & session
Connector selection
Tool toggles — each accepts
true or false; omit to use the org/role default.
Example — SQL-only embed locked to two connectors:
Embedding in Tableau
- In Tableau, create a new workbook and add a dashboard
- From the Objects panel, drag a Web Page object onto the dashboard
- Enter your embed URL:
https://app.textql.com/embed?authKey=YOUR_API_KEY - Resize the Web Page object to fit your layout
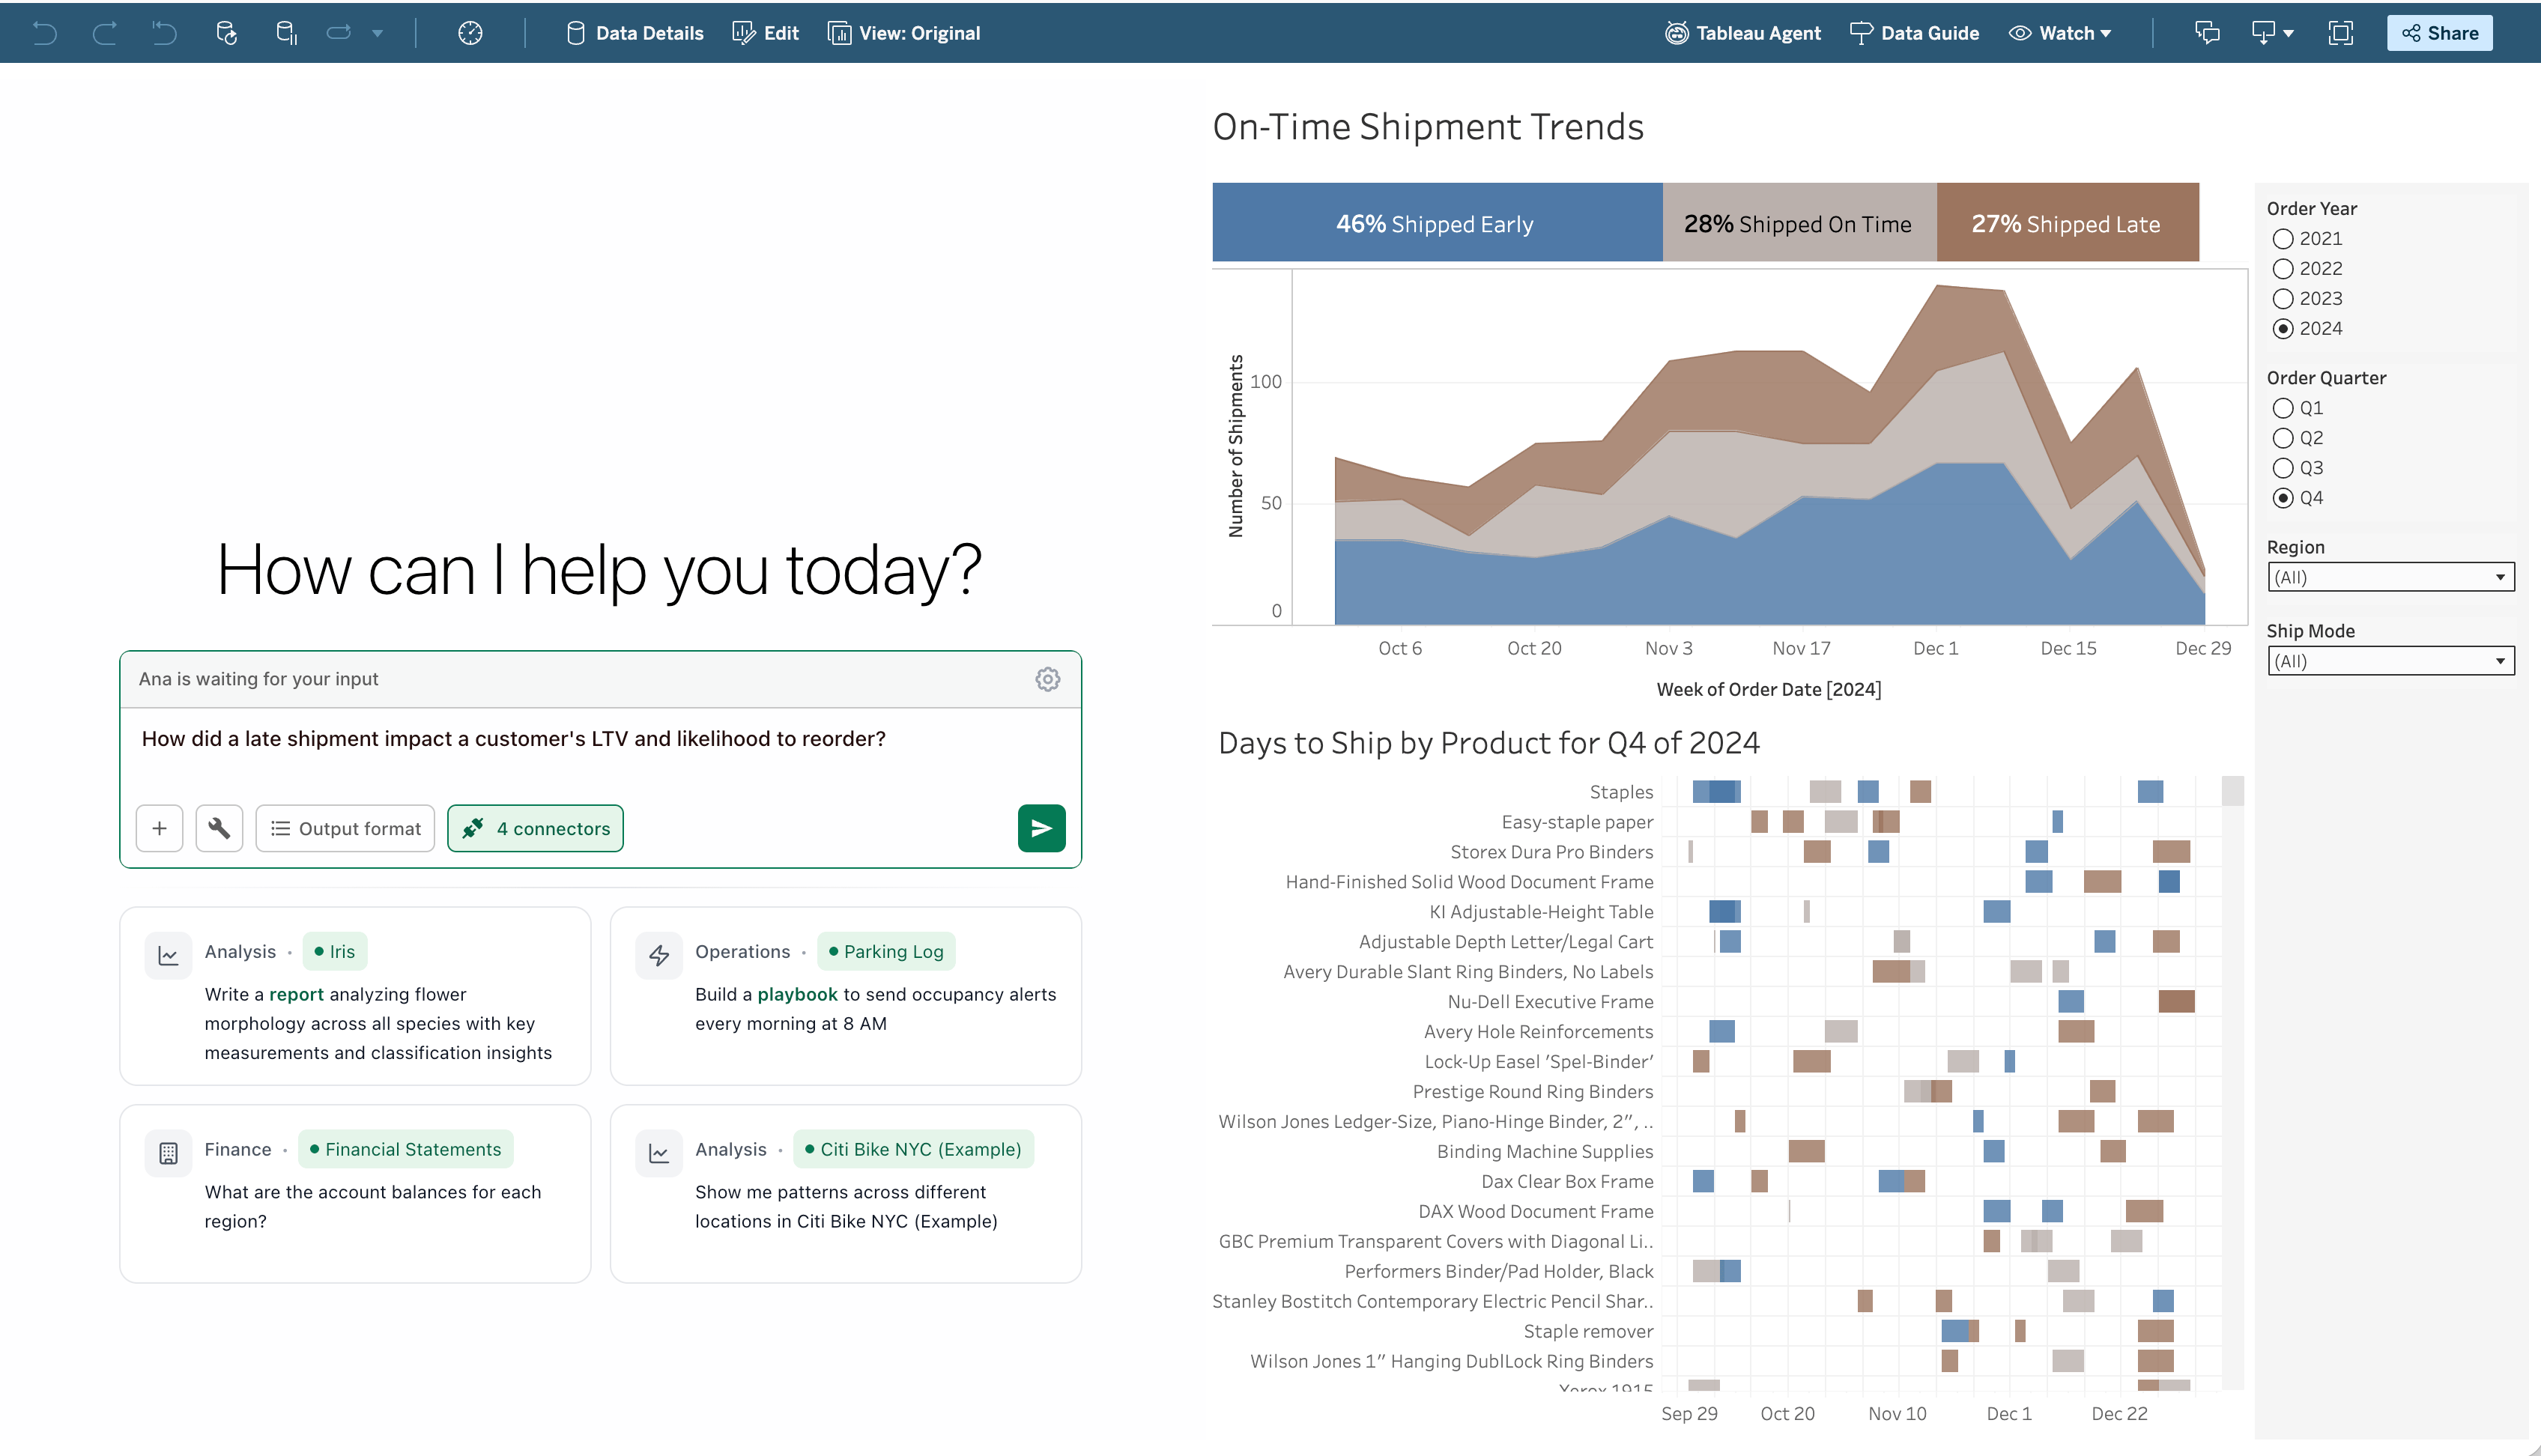
Ana embedded in a Tableau dashboard
One-Click Tableau Collection Chats
TextQL supports direct links to start chats with a specific Tableau collection already attached. Generating embed links (Admin only)- Open any chat and click Attach Tableau
- Hover over a collection card and click the link icon in the top-left corner
- The embed URL is automatically copied to your clipboard
authKey— your organization’s Embed User API key (auto-generated)tableauDatasetId— the ID of the Tableau collection to attachmessage— an optional initial message to auto-send when the chat opens
sqlEnabled=true requires connectorIds — SQL resolves against the attached warehouse connectors, so enabling it without connectors fails the chat. ontologyEnabled=true works on its own: it defaults to the ontology of the Tableau collection’s connector, and connectorIds can additionally attach other connectors whose ontologies should be available.
Embedding in Other BI Tools
The same iframe pattern works in any tool that supports embedded web content:- Internal portals — React, Angular, Vue, etc.
- Confluence / SharePoint — via HTML embed macros
- Retool / Appsmith — via iframe components
API Reference
All API requests use base URLhttps://app.textql.com/v1 with a Bearer token in the Authorization header.
Endpoints
One-Shot Chat
Best for backend automations and scripts where you don’t need to show partial results.question— the natural-language question for AnachatId— pass an existing ID to continue a conversation, or omit to start a new onetools— configure which tools Ana can use (defaults applied if omitted)
Streaming Chat
Uses Connect-RPC to deliver tokens in real-time — ideal for user-facing apps with a live typing experience. Stream flow: initialize transport → sendStreamRequest → receive metadata → stream text tokens and preview URLs → final QUERY_STATUS_COMPLETE
Client SDKs
Tool Configuration
Security
The core principle: never expose a long-lived API key in frontend code.CreateApiKey. Keys expire automatically, each session is auditable, and roles are scoped per key. See the code example above.
Most secure — Backend proxy (Pattern A): Your frontend never sees a TextQL key at all. Your backend proxies all API calls, adding the Authorization: Bearer header server-side.
Simpler alternative — Role-based static keys (Pattern C): Create a dedicated TextQL user and key per user group. Your backend selects the right key based on the authenticated user’s role.
Security checklist:
- API keys stored server-side only (env vars, secrets manager)
- Frontend never contains hardcoded API keys
- Each embed use case has its own dedicated key
- Keys rotated on a regular schedule and unused keys revoked promptly
- SSO role mappings configured so new users get appropriate access automatically